前言
之前四五年的时间里也算写过五六百篇博客。以前的 Hexo 顶不住博客数量的压力了,所以,切到 Hugo 试一下。
涉及工具
除了搭建博客和介绍如何使用这个博客框架这样一个流程本身,还包含了对 PaperMod 这个主题的一些细节的定制。
本文涉及到的工具或者网站:
为什么
这里主要解释一下为什么要选择这样一个组合。
- 选择 hugo 纯粹是因为快。
- 选择 PaperMod 这个主题是因为它的 star 数量挺高的,不过,比起 hexo 的主题生态还是差得太远了,文档也相当简陋。不过,没办法,这已经算是最好的一档了。
- 博客选择托管在 github pages 上面是因为稳定,而且没有限制,基本上没有内容审查。我之前也使用 hexo 配合 github 搭建过静态博客,之前写过大概几百篇博客,从来没有遇到过内容审查,当然,也从来没有想过写一些很敏感的东西。
- 图床选择的是 postiamge,这个是免费的,类似的还有 imgur,但是 imgur 的图片加载速度在一些地方实在是堪忧甚至经常加载不出来,只好换上另一个有很多年头的网站了,正因为年纪大,所以给人的感觉是稳定。
- 评论使用 giscus 是因为快,因为也是使用 github 的服务,利用的是 github discussion,所以,比 discus 之类的小厂要快。稳定性倒是差不多。以及,github 的用户是比较多的,所以会更方便大家评论交流,这一点很重要。
- neovim/vscode 是用来编辑配置用的,编辑工具/IDE这一点见仁见智。
- git 不用多说了。
- flaticon 是用来挑选网站的 favicon 的。
总结一下,就是几个词儿:免费、快、稳。
安装
首先,安装 hugo,在 Windows 中,推荐使用 scoop 来安装预编译的二进制版本,
1scoop install hugo-extended
安装完之后,执行命令看一下版本信息,
1hugo version
看到类似下面的输出,就说明安装成功了,

使用
创建博客
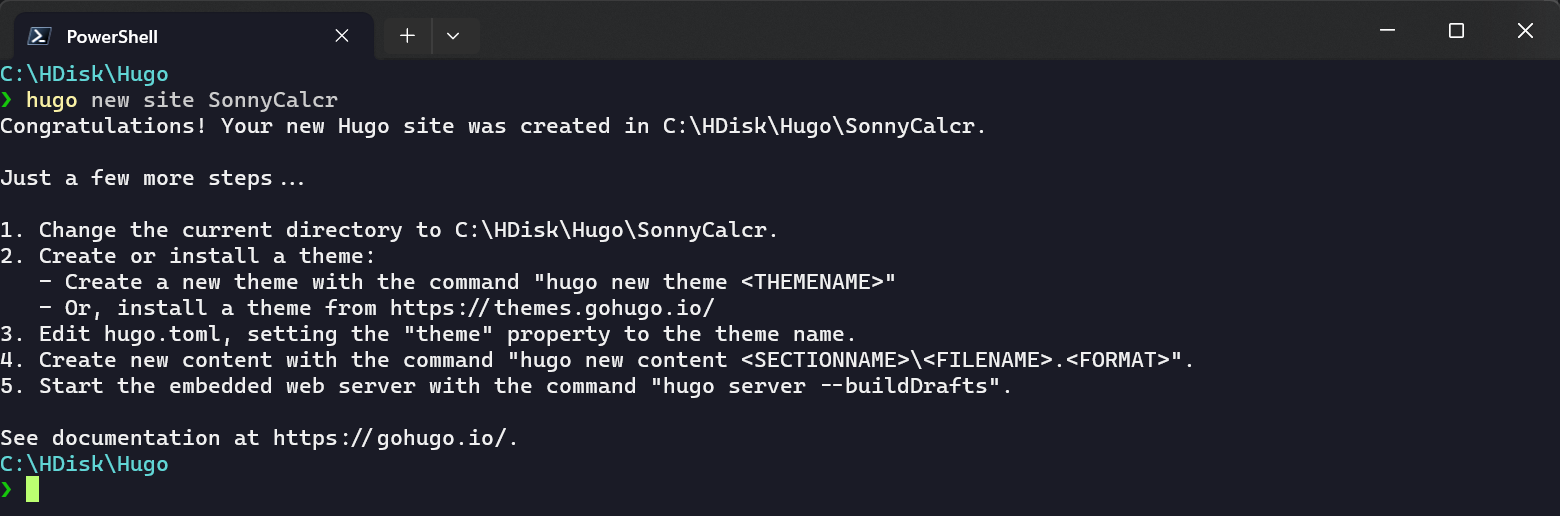
然后,我们就使用 hugo 在本地创建一个站点,也就是一个博客,
按:这里可以参考 hugo 官网的指导。
1hugo new site SonnyCalcr
然后,
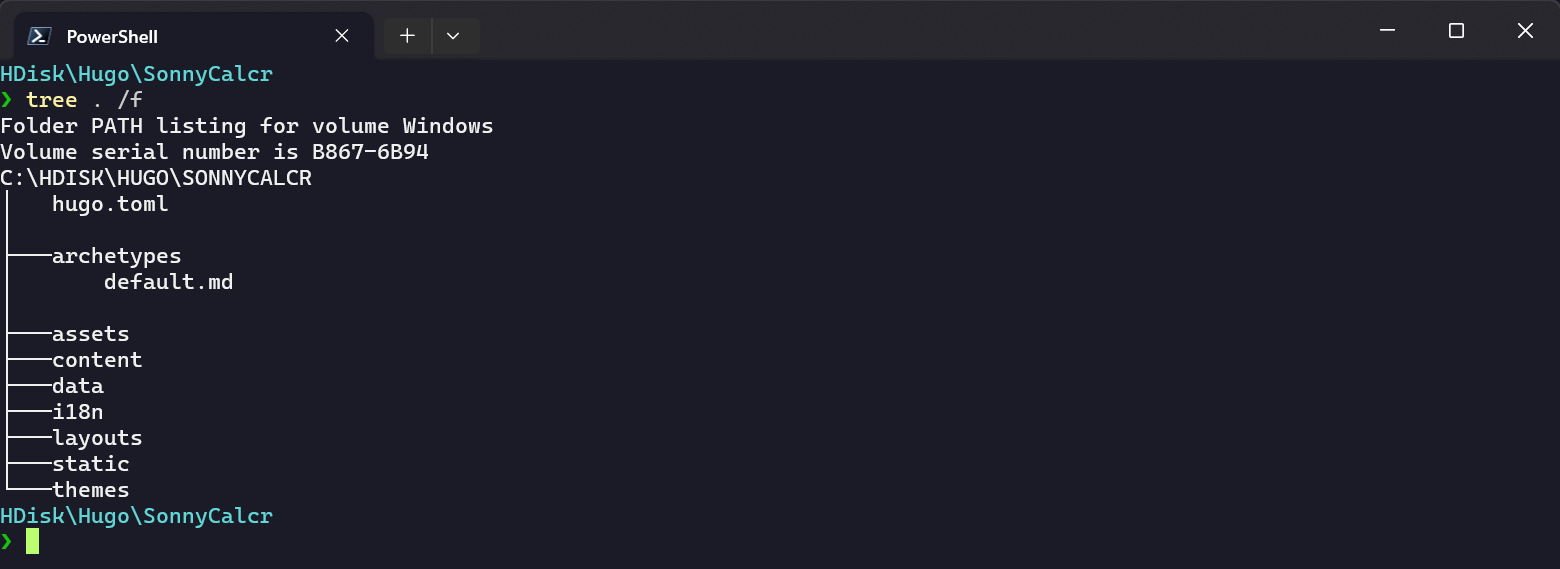
1cd SonnyCalcr
2tree . /f
可以看到默认创建的一些文件和目录,
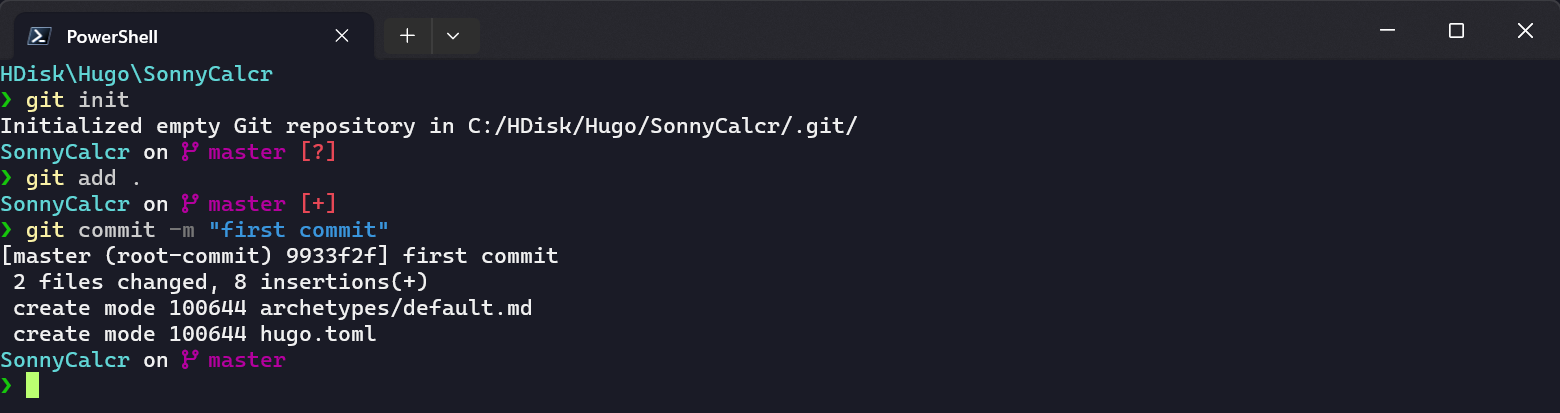
然后,我们先将此目录初始化成 git 仓库,
1git init
2git add .
3git commit -m "first commit"
添加 PaperMod 主题
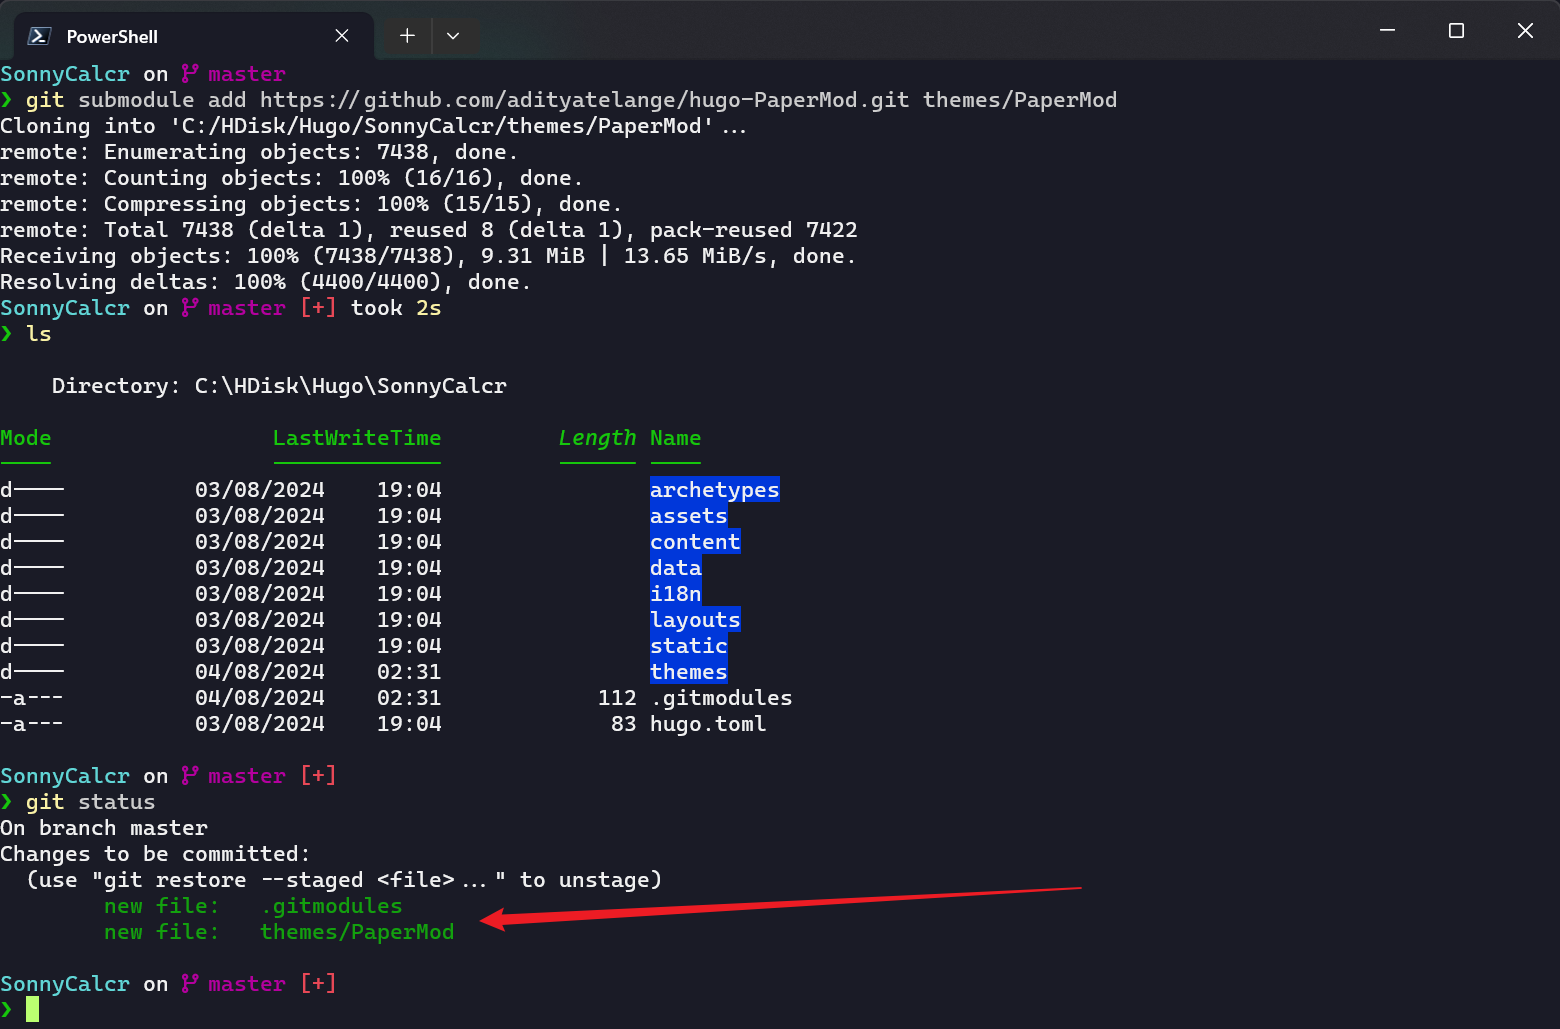
1git submodule add https://github.com/adityatelange/hugo-PaperMod.git themes/PaperMod
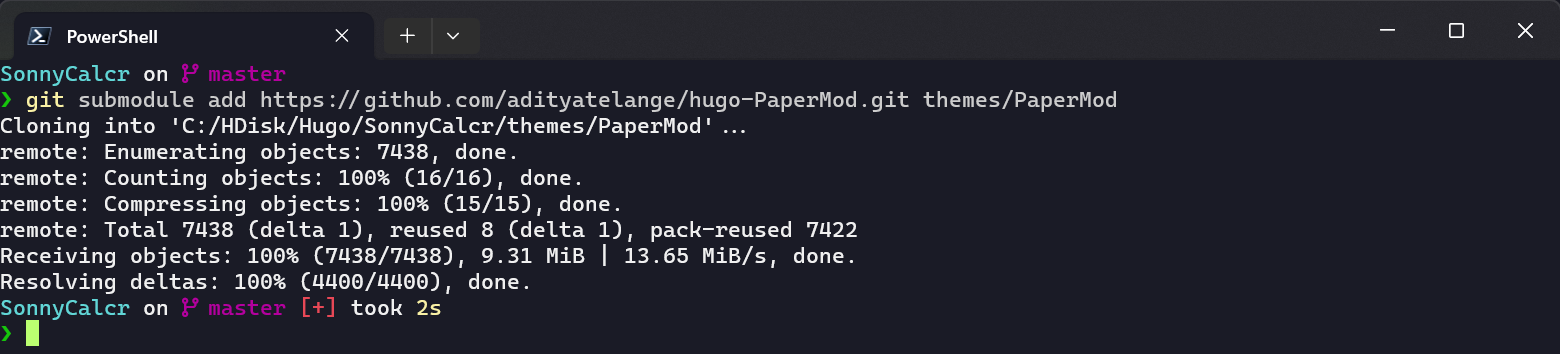
可以看到,这个命令执行完之后新增的内容,其实就是往 thems 目录下添加了一个主题,而 .gitmodules 则是记录了添加的这个主题的模块的信息,
然后,我们可以再看 PaperMod 这个主题里面都有些什么文件,从下面的命令的输出可以看到,基本上就是一些 html、css 和 js 文件,毕竟是主题嘛,
  1❯ tree .\themes\PaperMod\ /f
  2Folder PATH listing for volume Windows
  3Volume serial number is B867-6B94
  4C:\HDISK\HUGO\SONNYCALCR\THEMES\PAPERMOD
  5│   go.mod
  6│   LICENSE
  7│   README.md
  8│   theme.toml
  9│
 10├───.github
 11│   │   PULL_REQUEST_TEMPLATE.md
 12│   │
 13│   ├───ISSUE_TEMPLATE
 14│   │       bug_report.md
 15│   │       config.yml
 16│   │       proposal.md
 17│   │
 18│   └───workflows
 19│           gh-pages.yml
 20│
 21├───assets
 22│   ├───css
 23│   │   ├───common
 24│   │   │       404.css
 25│   │   │       archive.css
 26│   │   │       footer.css
 27│   │   │       header.css
 28│   │   │       main.css
 29│   │   │       post-entry.css
 30│   │   │       post-single.css
 31│   │   │       profile-mode.css
 32│   │   │       search.css
 33│   │   │       terms.css
 34│   │   │
 35│   │   ├───core
 36│   │   │       license.css
 37│   │   │       reset.css
 38│   │   │       theme-vars.css
 39│   │   │       zmedia.css
 40│   │   │
 41│   │   ├───extended
 42│   │   │       blank.css
 43│   │   │
 44│   │   └───includes
 45│   │           chroma-mod.css
 46│   │           chroma-styles.css
 47│   │           scroll-bar.css
 48│   │
 49│   └───js
 50│           fastsearch.js
 51│           fuse.basic.min.js
 52│           license.js
 53│
 54├───i18n
 55│       ar.yaml
 56│       be.yaml
 57│       bg.yaml
 58│       bn.yaml
 59│       ca.yaml
 60│       ckb.yaml
 61│       cs.yaml
 62│       da.yaml
 63│       de.yaml
 64│       el.yaml
 65│       en.yaml
 66│       eo.yaml
 67│       es.yaml
 68│       fa.yaml
 69│       fr.yaml
 70│       he.yaml
 71│       hi.yaml
 72│       hr.yaml
 73│       hu.yaml
 74│       id.yaml
 75│       it.yaml
 76│       ja.yaml
 77│       ko.yaml
 78│       ku.yaml
 79│       mn.yaml
 80│       ms.yaml
 81│       nl.yaml
 82│       no.yaml
 83│       oc.yaml
 84│       pa.yaml
 85│       pl.yaml
 86│       pnb.yaml
 87│       pt.yaml
 88│       ro.yaml
 89│       ru.yaml
 90│       sk.yaml
 91│       sv.yaml
 92│       sw.yaml
 93│       th.yaml
 94│       tr.yaml
 95│       uk.yaml
 96│       uz.yaml
 97│       vi.yaml
 98│       zh-tw.yaml
 99│       zh.yaml
100│
101├───images
102│       screenshot.png
103│       tn.png
104│
105└───layouts
106    │   404.html
107    │   robots.txt
108    │
109    ├───partials
110    │   │   anchored_headings.html
111    │   │   author.html
112    │   │   breadcrumbs.html
113    │   │   comments.html
114    │   │   cover.html
115    │   │   edit_post.html
116    │   │   extend_footer.html
117    │   │   extend_head.html
118    │   │   footer.html
119    │   │   head.html
120    │   │   header.html
121    │   │   home_info.html
122    │   │   index_profile.html
123    │   │   post_canonical.html
124    │   │   post_meta.html
125    │   │   post_nav_links.html
126    │   │   share_icons.html
127    │   │   social_icons.html
128    │   │   svg.html
129    │   │   toc.html
130    │   │   translation_list.html
131    │   │
132    │   └───templates
133    │       │   opengraph.html
134    │       │   schema_json.html
135    │       │   twitter_cards.html
136    │       │
137    │       └───_funcs
138    │               get-page-images.html
139    │
140    ├───shortcodes
141    │       collapse.html
142    │       figure.html
143    │       inTextImg.html
144    │       ltr.html
145    │       rawhtml.html
146    │       rtl.html
147    │
148    └───_default
149        │   archives.html
150        │   baseof.html
151        │   index.json
152        │   list.html
153        │   rss.xml
154        │   search.html
155        │   single.html
156        │   terms.html
157        │
158        └───_markup
159                render-image.html
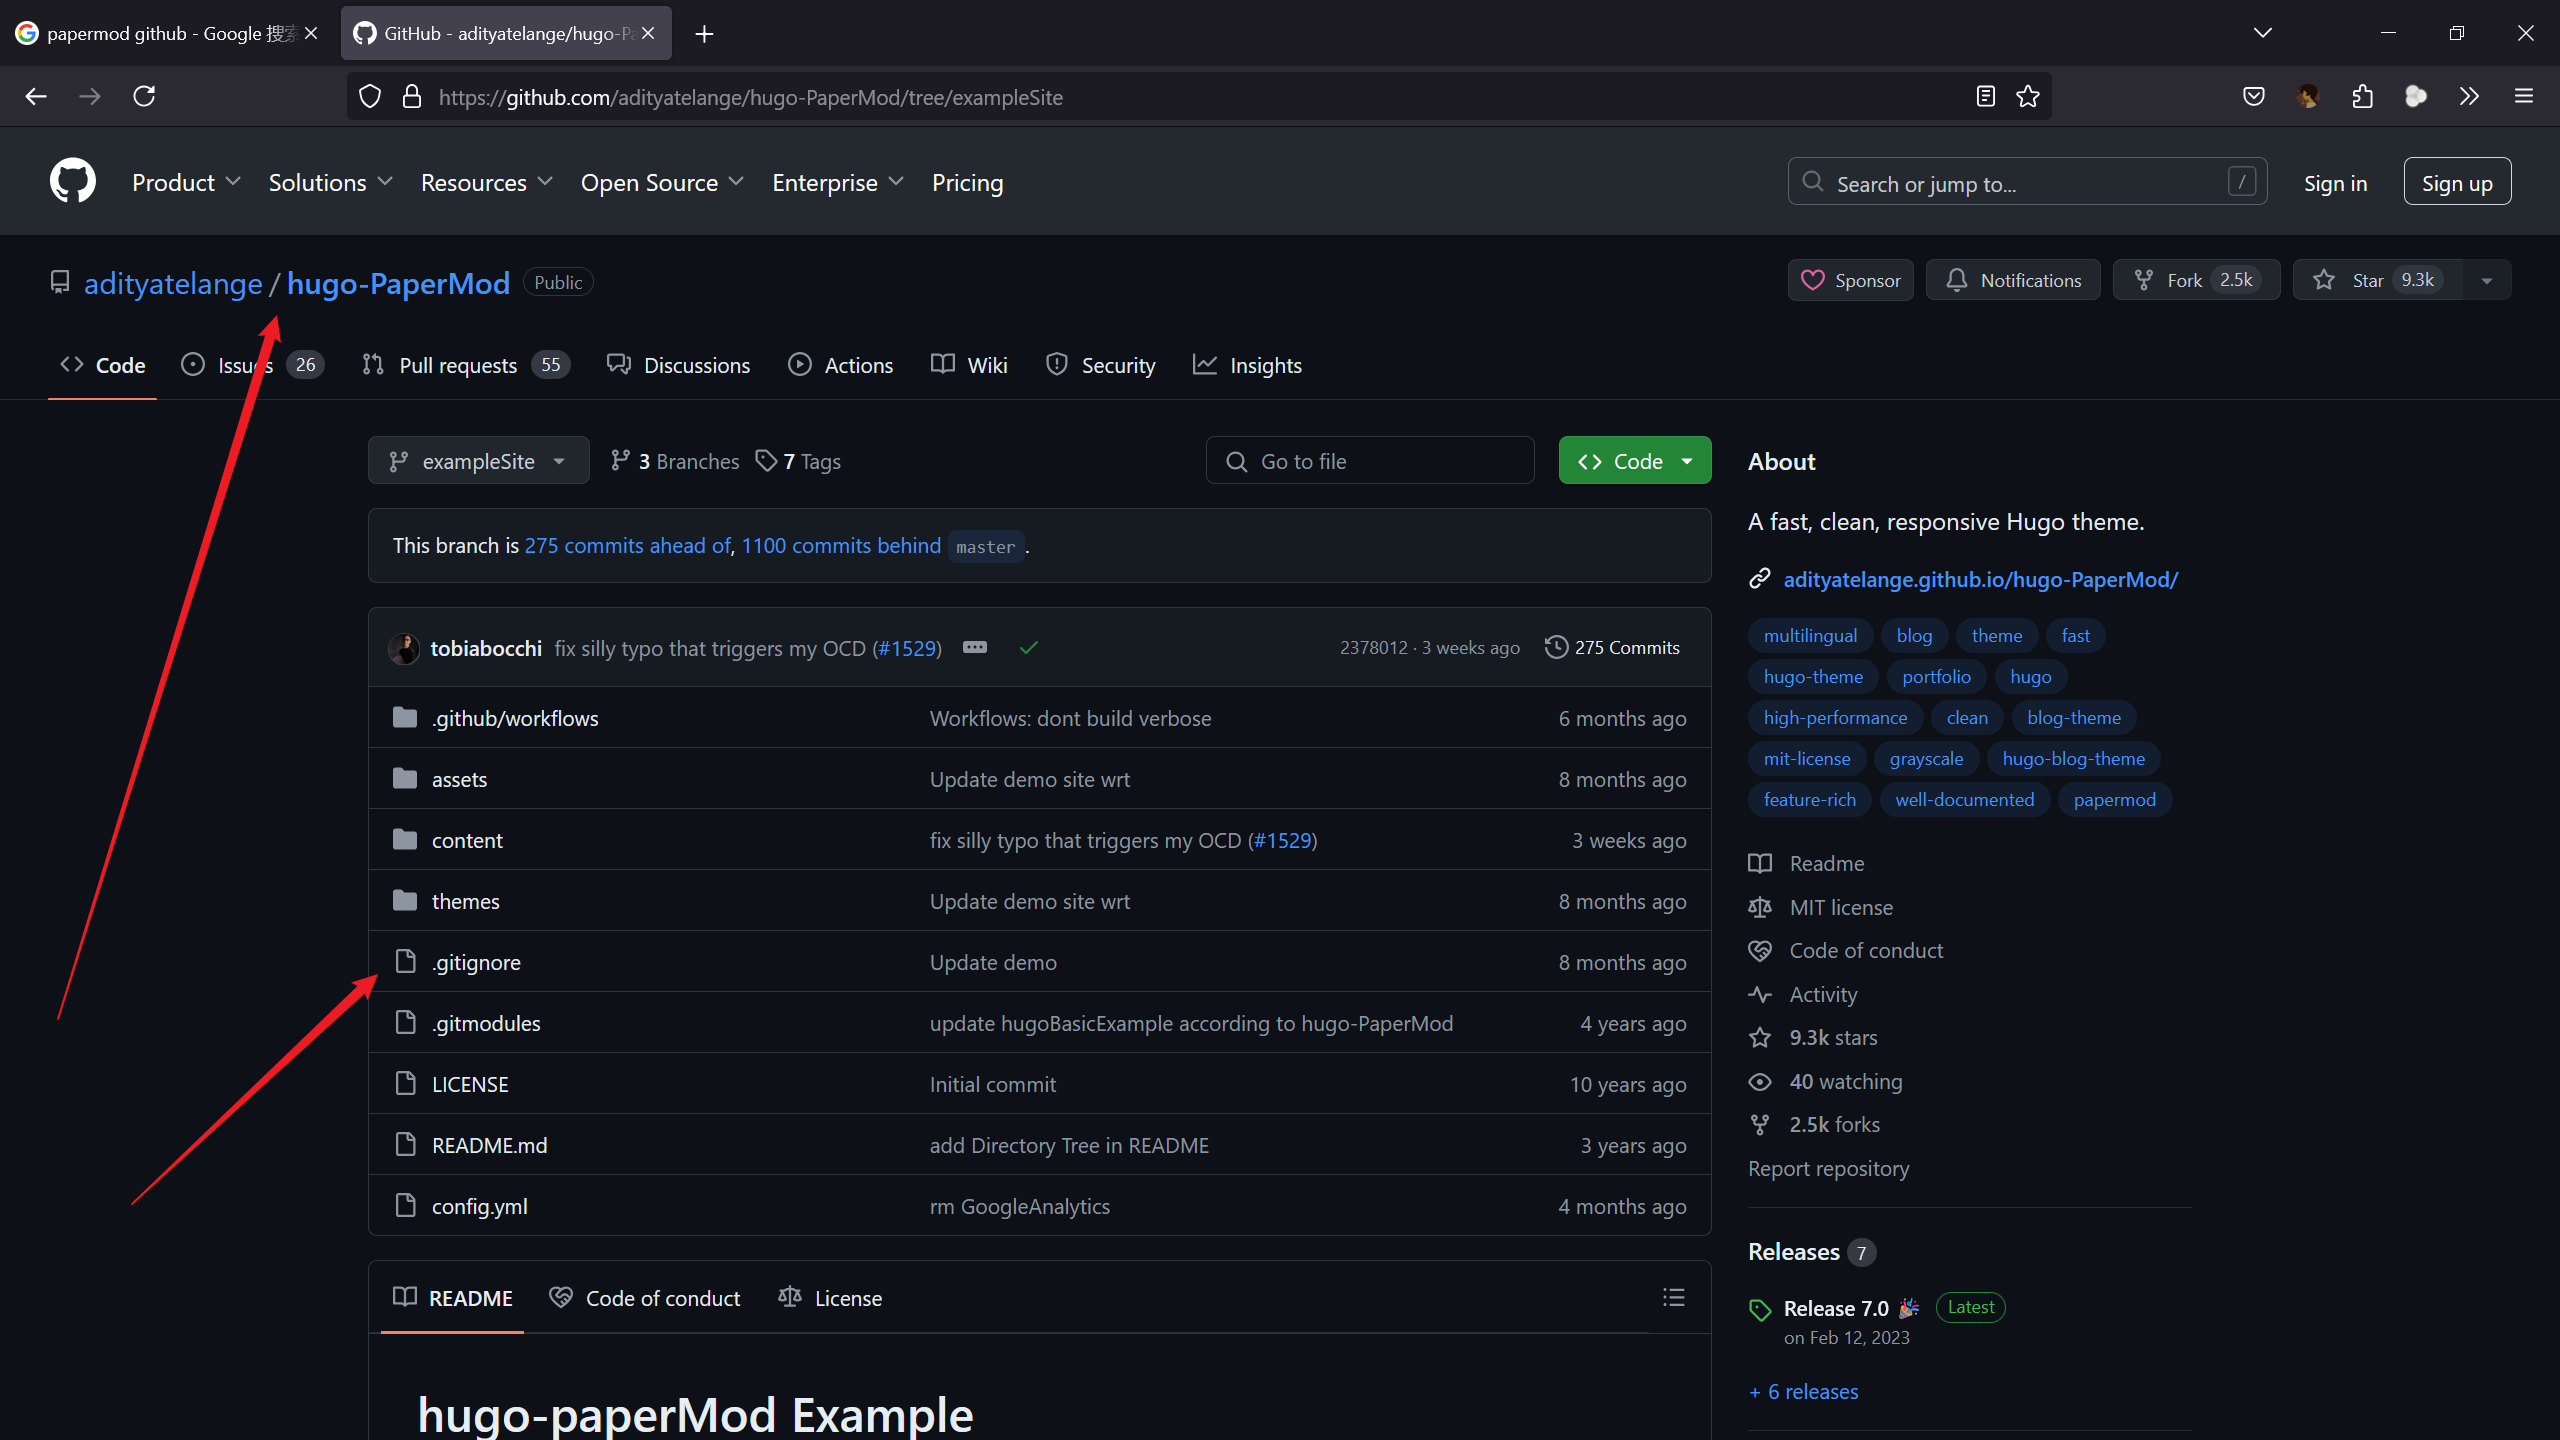
然后,可以添加一下 .gitignore 文件,我这里就直接照抄 PaperMod 的作者部署的那个网站的文件了,
 1# Compiled Object files, Static and Dynamic libs (Shared Objects)
 2*.o
 3*.a
 4*.so
 5
 6# Folders
 7_obj
 8_test
 9
10# Architecture specific extensions/prefixes
11*.[568vq]
12[568vq].out
13
14*.cgo1.go
15*.cgo2.c
16_cgo_defun.c
17_cgo_gotypes.go
18_cgo_export.*
19
20_testmain.go
21
22*.exe
23*.test
24
25/public
26.DS_Store
27.hugo_build.lock
28resources/_gen/
其实这里主要就是把 public 目录给排除掉,这个会在网页部署的时候自动生成。
接下来就是正式的主题配置了。
配置 PaperMod 主题
配置好之后相较于默认效果的一些改进
- 支持 giscus 进行评论,且主题支持明暗切换。
- 支持 mathjax,但是如果数学块公式中有超过三个花括号,那么,需要将整个数学公式包括外围的
$$符号都用div标签包裹起来。 - 代码字体自定义为 Jetbrains Mono。代码的亮色主题为 tokyo-night-light,暗色主题为 github-dark。
- 移动端隐藏返回顶部的按钮。
- 一些自定义 css 的效果,如字体大小、链接颜色、目录上的悬浮的鼠标图标等等。
主要就是上面几点,因为文档写得不详细,所以配置上面的内容花费了一些时间和工夫。
一些基本信息的配置
首先,把博客根目录下的 hugo.toml 文件改成 hugo.yaml,因为 PaperMod 给出的配置文件就是 yaml 格式的,所以,这里改一下文件格式,就省去了我们再去将 yaml 的配置内容转为 toml 的麻烦,
1Rename-Item .\hugo.toml hugo.yaml
然后,配置一下基本信息,基本上每一个选项我都打上了注释,
 1baseURL: "https://sonnycalcr.github.io/" # 主站的 URL
 2title: SonnyCalcr's Blog # 站点标题
 3copyright: "[©2024 SonnyCalcr's Blog](https://sonnycalcr.github.io/)" # 网站的版权声明,通常显示在页脚
 4theme: PaperMod # 主题
 5languageCode: zh-cn # 语言
 6
 7enableInlineShortcodes: true # shortcode,类似于模板变量,可以在写 markdown 的时候便捷地插入,官方文档中有一个视频讲的很通俗
 8hasCJKLanguage: true # 是否有 CJK 的字符
 9enableRobotsTXT: true # 允许生成 robots.txt
10buildDrafts: false # 构建时是否包括草稿
11buildFuture: false # 构建未来发布的内容
12buildExpired: false # 构建过期的内容
13enableEmoji: true # 允许 emoji
14pygmentsUseClasses: true
15defaultContentLanguage: zh # 顶部首先展示的语言界面
16defaultContentLanguageInSubdir: false # 是否要在地址栏加上默认的语言代码
配置导航栏
 1languages:
 2  zh:
 3    languageName: "中文" # 展示的语言名
 4    weight: 1 # 权重
 5    taxonomies: # 分类系统
 6      category: categories
 7      tag: tags
 8    # https://gohugo.io/content-management/menus/#define-in-site-configuration
 9    menus:
10      main:
11        - name: 首页
12          pageRef: /
13          weight: 4 # 控制在页面上展示的前后顺序
14        - name: 归档
15          pageRef: archives/
16          weight: 5
17        - name: 分类
18          pageRef: categories/
19          weight: 10
20        - name: 标签
21          pageRef: tags/
22          weight: 10
23        - name: 搜索
24          pageRef: search/
25          weight: 20
26        - name: 关于
27          pageRef: about/
28          weight: 21
配置归档
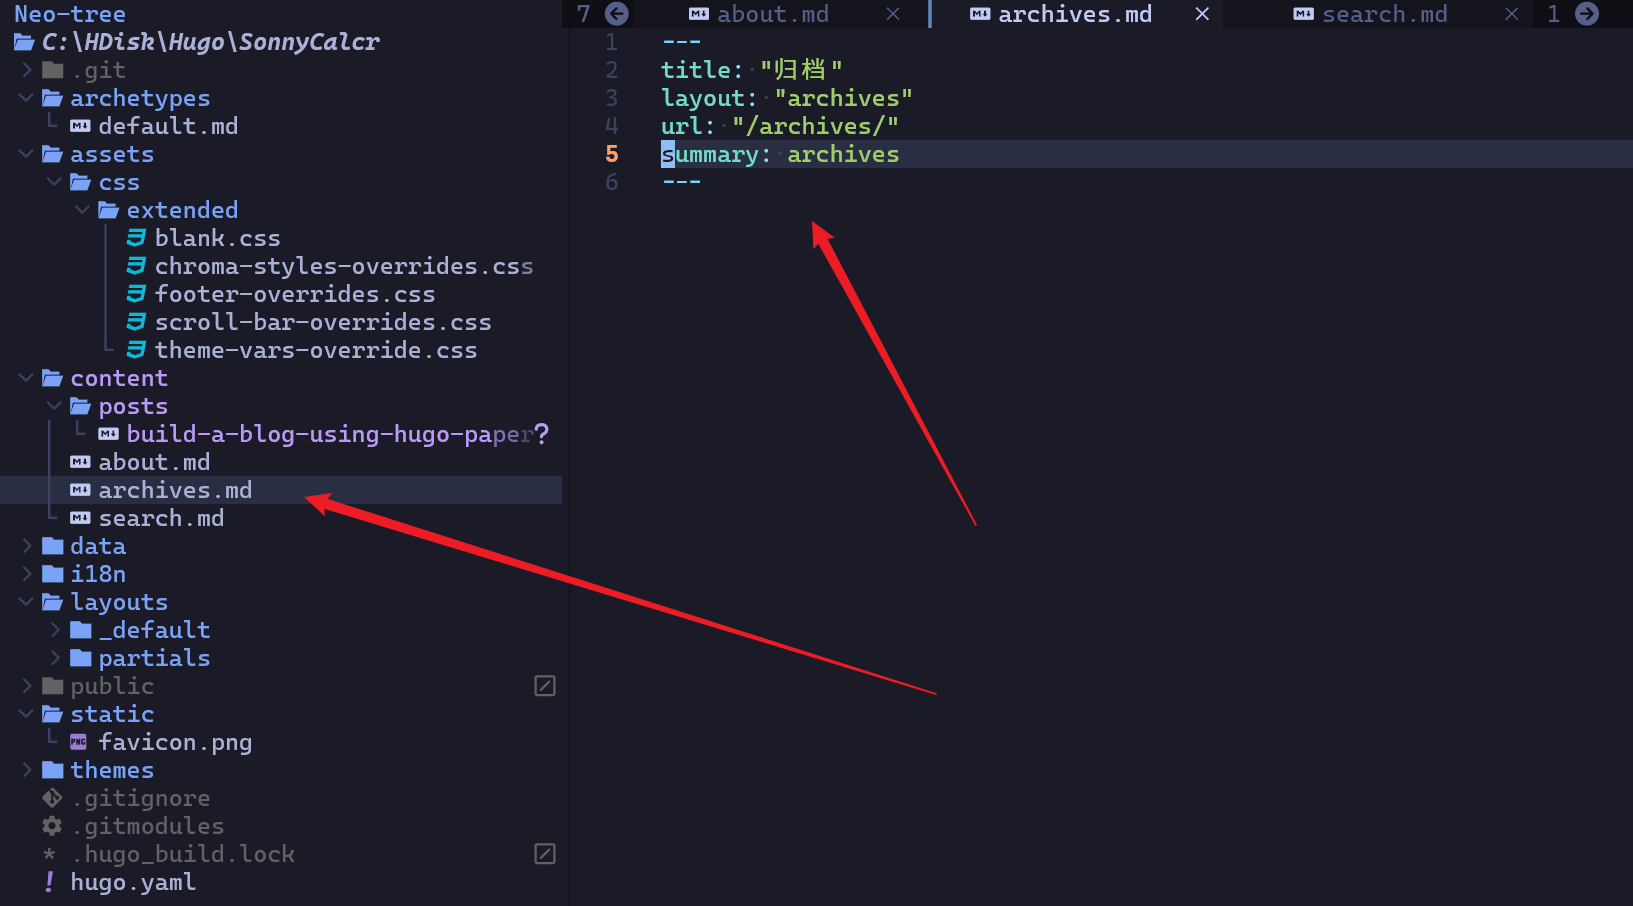
在 content 目录下新建 archives.md 文件,内容如下,
1---
2title: "归档"
3layout: "archives"
4url: "/archives/"
5summary: archives
6---
配置分类和标签
在 hugo 中,这俩是一样的。上面配置好了 taxonomies 之后,我们在博客的 front matter 中加上相关信息即可,就拿本篇博客举例,
1title = 'Hugo + PaperMod + Github Pages 搭建一个完善的个人博客(以 Windows11 为例)'
2date = 2024-08-04T03:25:53+08:00
3categories = ["通用技术"]
4tags = ["博客搭建", "Bilibili"]
然后执行一下 hugo server 就可以在浏览器中预览一下效果了。
配置搜索
要在 output 中加上 JSON,
1# https://github.com/adityatelange/hugo-PaperMod/wiki/Features#search-page
2outputs:
3  home:
4    - HTML # 生成的静态页面
5    - RSS # 这个其实无所谓
6    - JSON # necessary for search, 这里的配置修改好之后,一定要重新生成一下
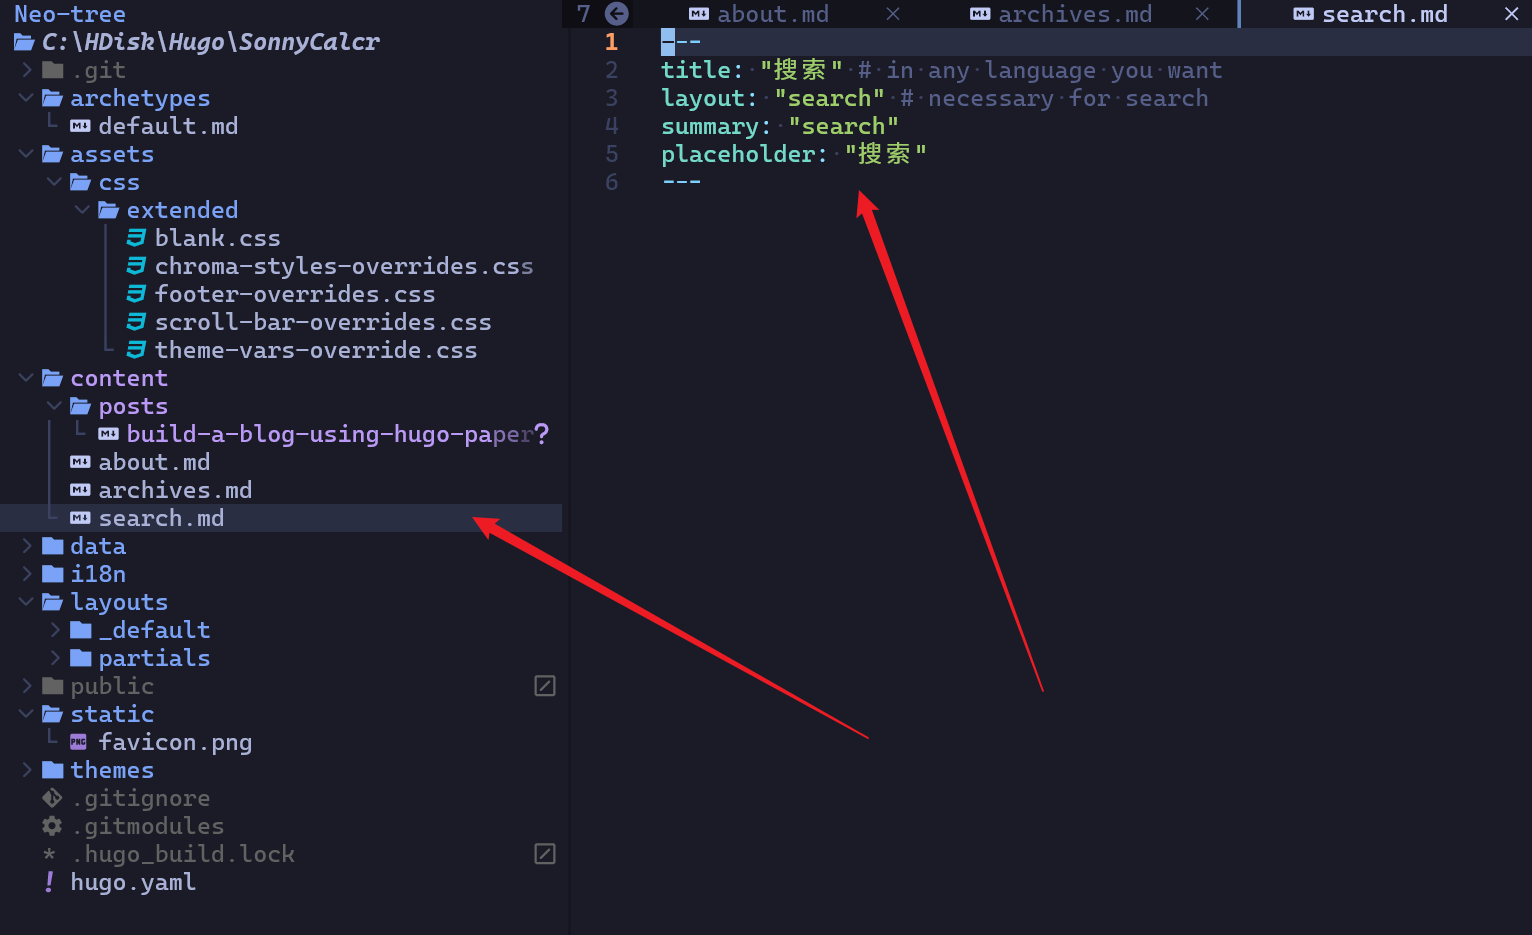
然后,在 content 目录下新建一个 search.md 文件,
1---
2title: "搜索" # in any language you want
3layout: "search" # necessary for search
4summary: "search"
5placeholder: "搜索"
6---
然后是搜索的一些个性化设置,
 1params:
 2  # 搜索
 3  fuseOpts:
 4      isCaseSensitive: false # 是否大小写敏感
 5      shouldSort: true # 是否排序
 6      location: 0
 7      distance: 1000
 8      threshold: 0.4
 9      minMatchCharLength: 0
10      # limit: 10 # refer: https://www.fusejs.io/api/methods.html#search
11      keys: ["title", "permalink", "summary", "content"]
12      includeMatches: true
这样以来,搜索就可以正常工作了,
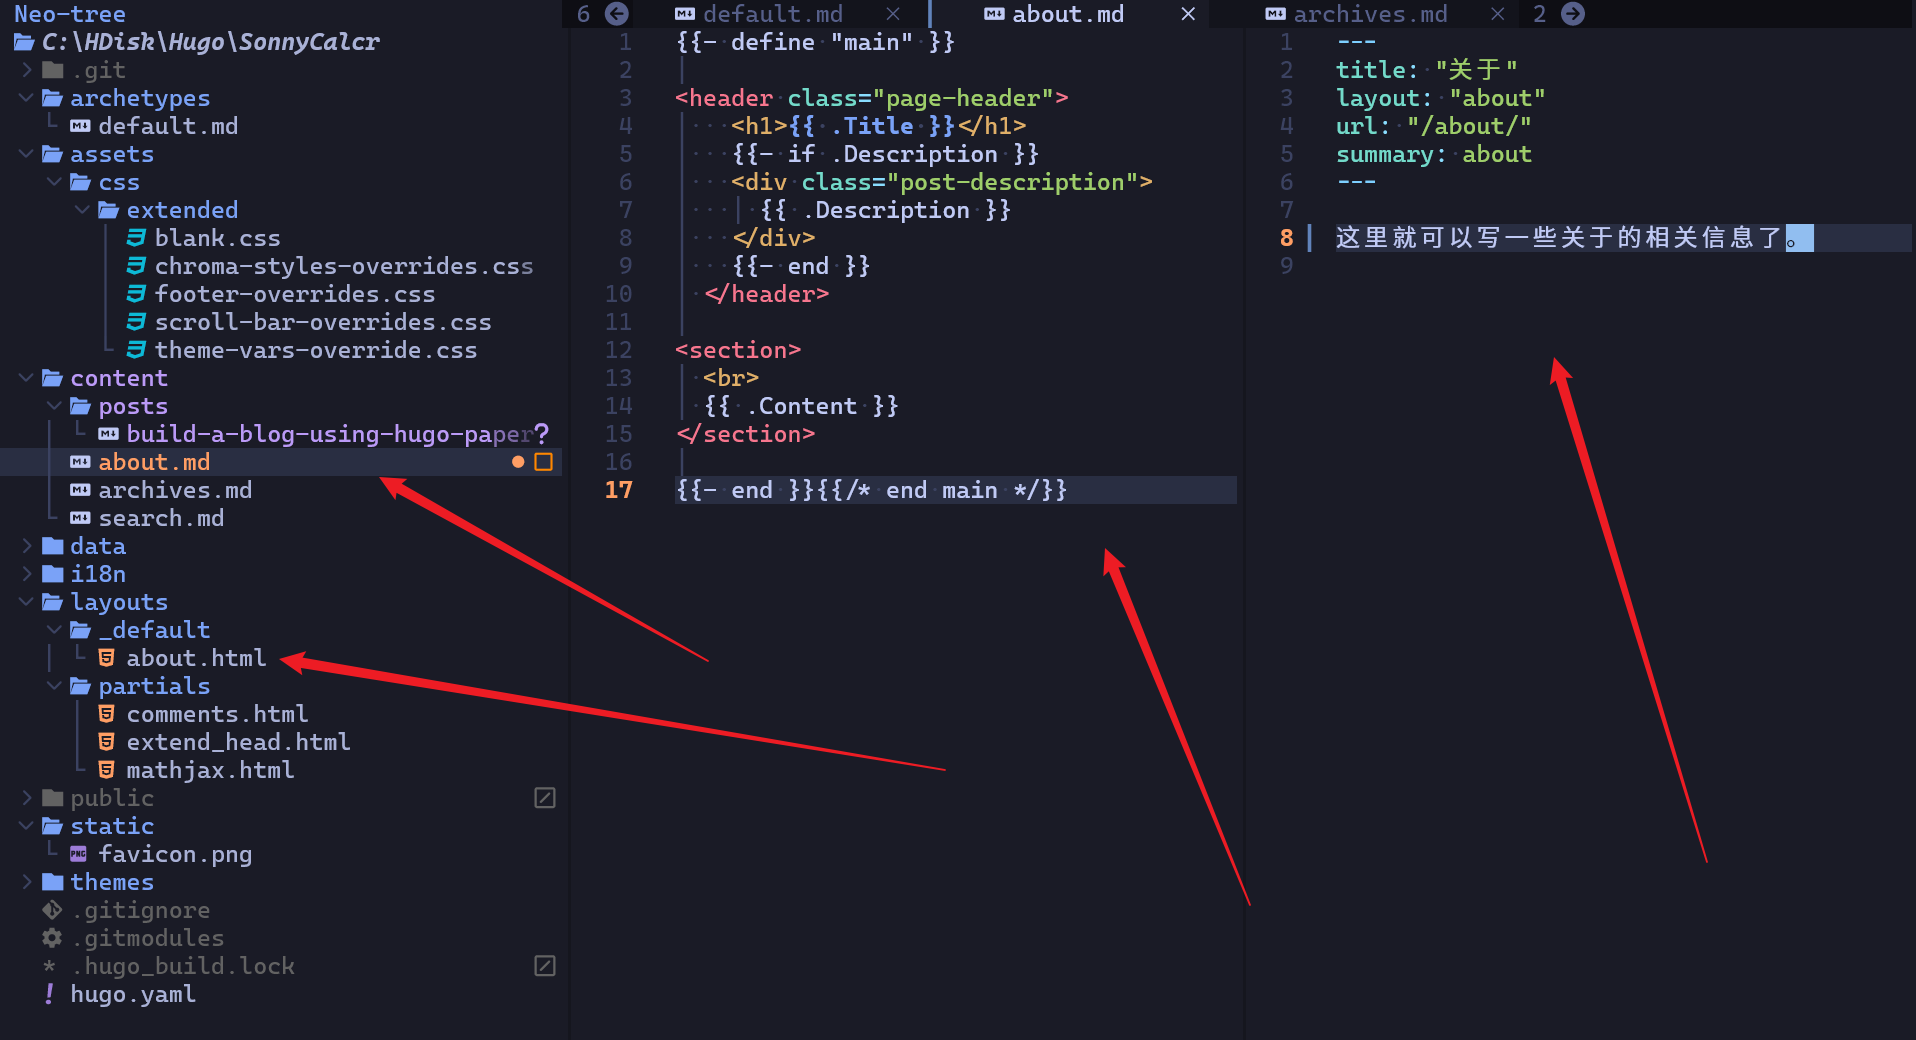
配置关于页面
新建两个文件,一个是 layouts\_default 目录下下的 about.html,
 1{{- define "main" }}
 2
 3<header class="page-header">
 4    <h1>{{ .Title }}</h1>
 5    {{- if .Description }}
 6    <div class="post-description">
 7      {{ .Description }}
 8    </div>
 9    {{- end }}
10  </header>
11
12<section>
13  <br>
14  {{ .Content }}
15</section>
16
17{{- end }}{{/* end main */}}
另一个是 content 目录下的 about.md,
1---
2title: "关于"
3layout: "about"
4url: "/about/"
5summary: about
6---
7
8这里就可以写一些关于的相关信息了。
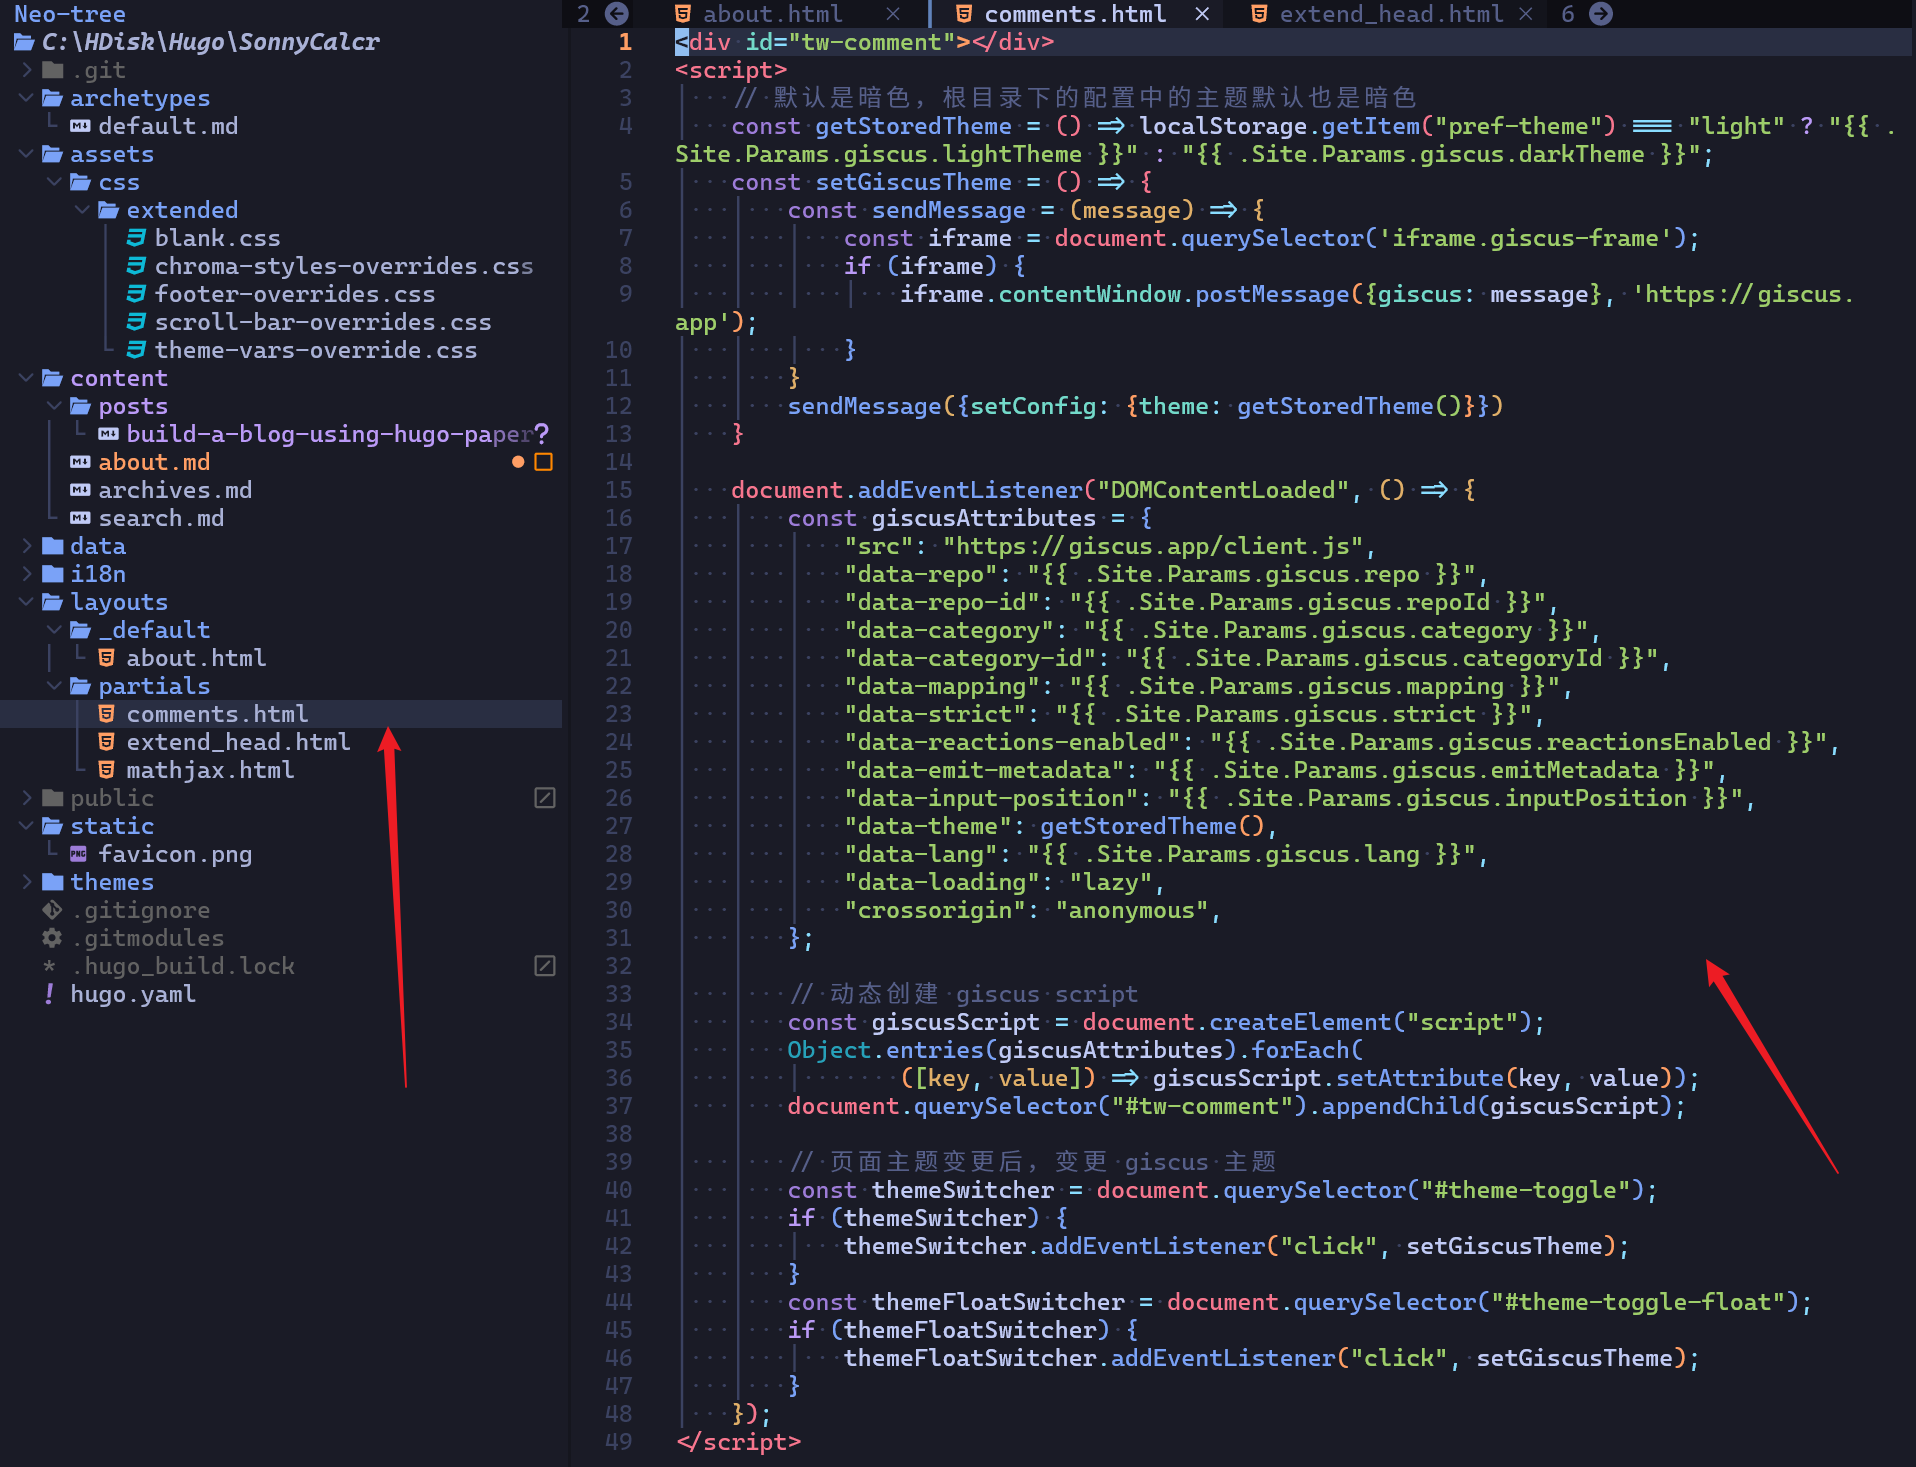
配置评论
这里的评论使用了 giscus 插件。
先在 layouts\partials 下新建一个 comments.html 文件,
 1<div id="tw-comment"></div>
 2<script>
 3    // 默认是暗色,根目录下的配置中的主题默认也是暗色
 4    const getStoredTheme = () => localStorage.getItem("pref-theme") === "light" ? "{{ .Site.Params.giscus.lightTheme }}" : "{{ .Site.Params.giscus.darkTheme }}";
 5    const setGiscusTheme = () => {
 6        const sendMessage = (message) => {
 7            const iframe = document.querySelector('iframe.giscus-frame');
 8            if (iframe) {
 9                iframe.contentWindow.postMessage({giscus: message}, 'https://giscus.app');
10            }
11        }
12        sendMessage({setConfig: {theme: getStoredTheme()}})
13    }
14
15    document.addEventListener("DOMContentLoaded", () => {
16        const giscusAttributes = {
17            "src": "https://giscus.app/client.js",
18            "data-repo": "{{ .Site.Params.giscus.repo }}",
19            "data-repo-id": "{{ .Site.Params.giscus.repoId }}",
20            "data-category": "{{ .Site.Params.giscus.category }}",
21            "data-category-id": "{{ .Site.Params.giscus.categoryId }}",
22            "data-mapping": "{{ .Site.Params.giscus.mapping }}",
23            "data-strict": "{{ .Site.Params.giscus.strict }}",
24            "data-reactions-enabled": "{{ .Site.Params.giscus.reactionsEnabled }}",
25            "data-emit-metadata": "{{ .Site.Params.giscus.emitMetadata }}",
26            "data-input-position": "{{ .Site.Params.giscus.inputPosition }}",
27            "data-theme": getStoredTheme(),
28            "data-lang": "{{ .Site.Params.giscus.lang }}",
29            "data-loading": "lazy",
30            "crossorigin": "anonymous",
31        };
32
33        // 动态创建 giscus script
34        const giscusScript = document.createElement("script");
35        Object.entries(giscusAttributes).forEach(
36                ([key, value]) => giscusScript.setAttribute(key, value));
37        document.querySelector("#tw-comment").appendChild(giscusScript);
38
39        // 页面主题变更后,变更 giscus 主题
40        const themeSwitcher = document.querySelector("#theme-toggle");
41        if (themeSwitcher) {
42            themeSwitcher.addEventListener("click", setGiscusTheme);
43        }
44        const themeFloatSwitcher = document.querySelector("#theme-toggle-float");
45        if (themeFloatSwitcher) {
46            themeFloatSwitcher.addEventListener("click", setGiscusTheme);
47        }
48    });
49</script>
然后,根据 giscus 官网的指导,最后生成一份代码,
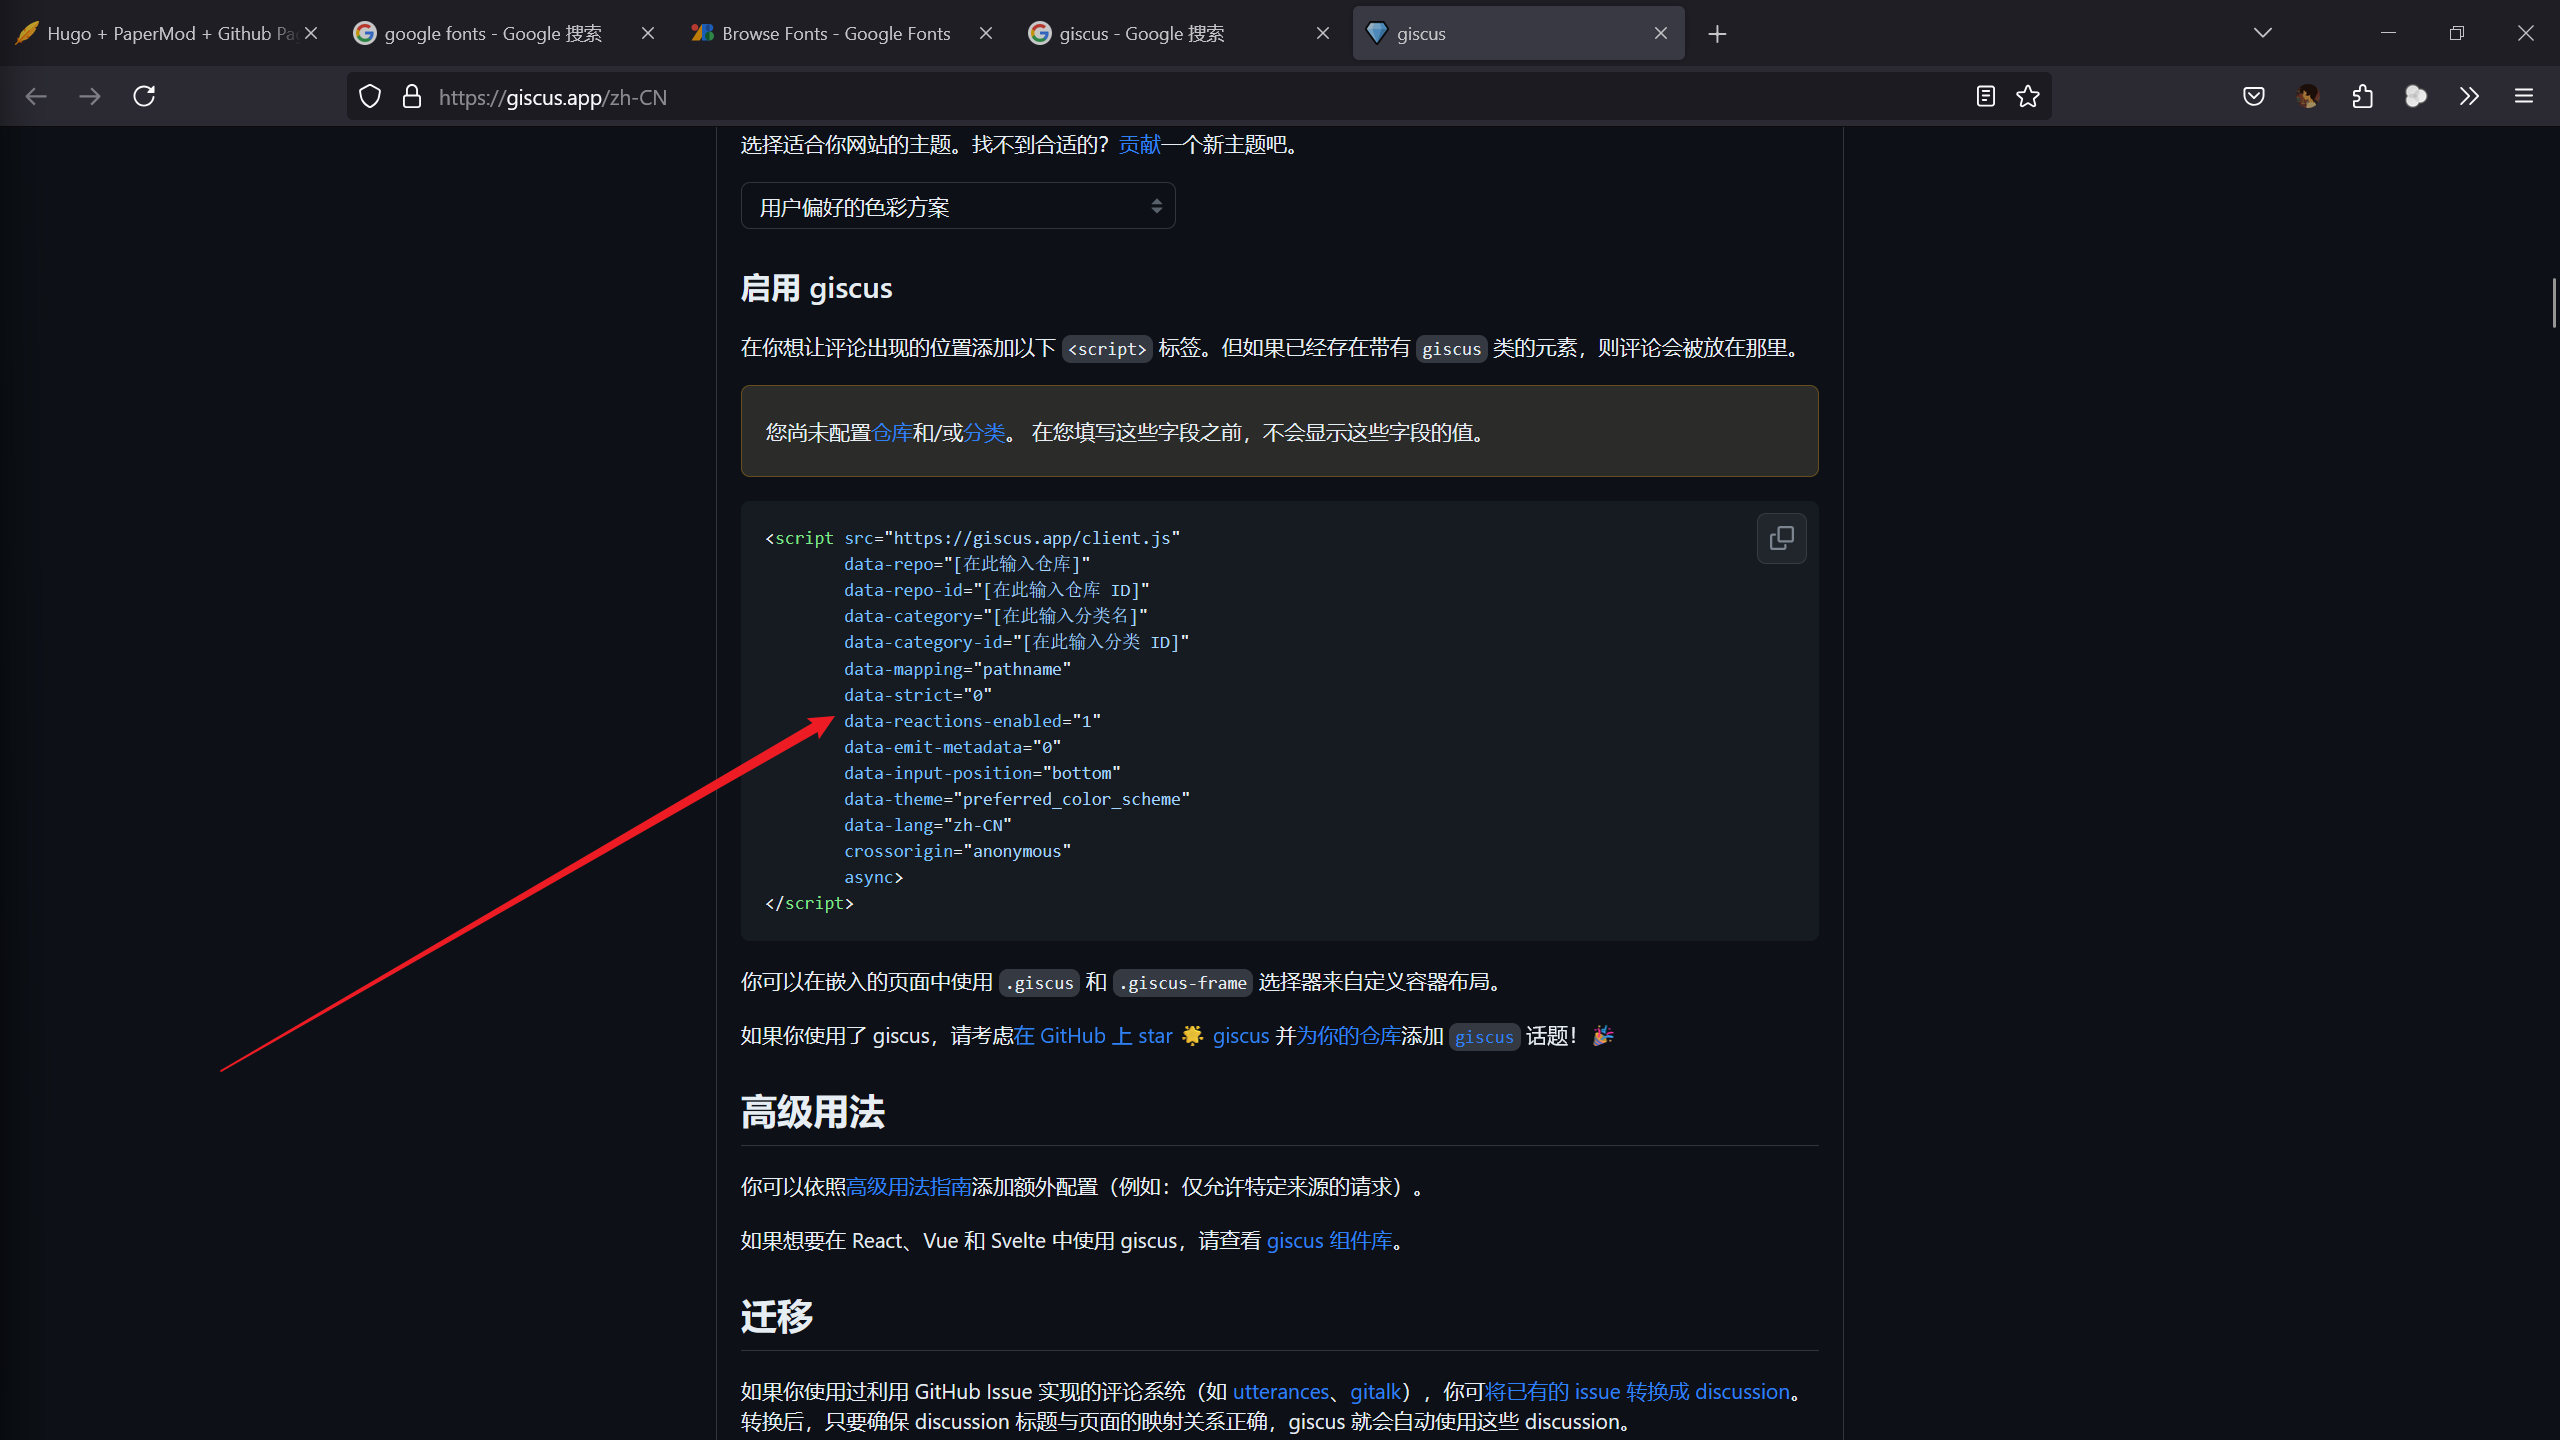
然后,把相应的字段提取到配置中,
 1params:
 2  # 评论的设置
 3  giscus:
 4    repo: "sonnycalcr/sonnycalcr.github.io"
 5    repoId: "xxxxxx"
 6    category: "Announcements"
 7    categoryId: "xxxxx"
 8    mapping: "pathname"
 9    strict: "0"
10    reactionsEnabled: "1"
11    emitMetadata: "0"
12    inputPosition: "bottom"
13    lightTheme: "light"
14    darkTheme: "dark"
15    lang: "zh-CN"
16    crossorigin: "anonymous"
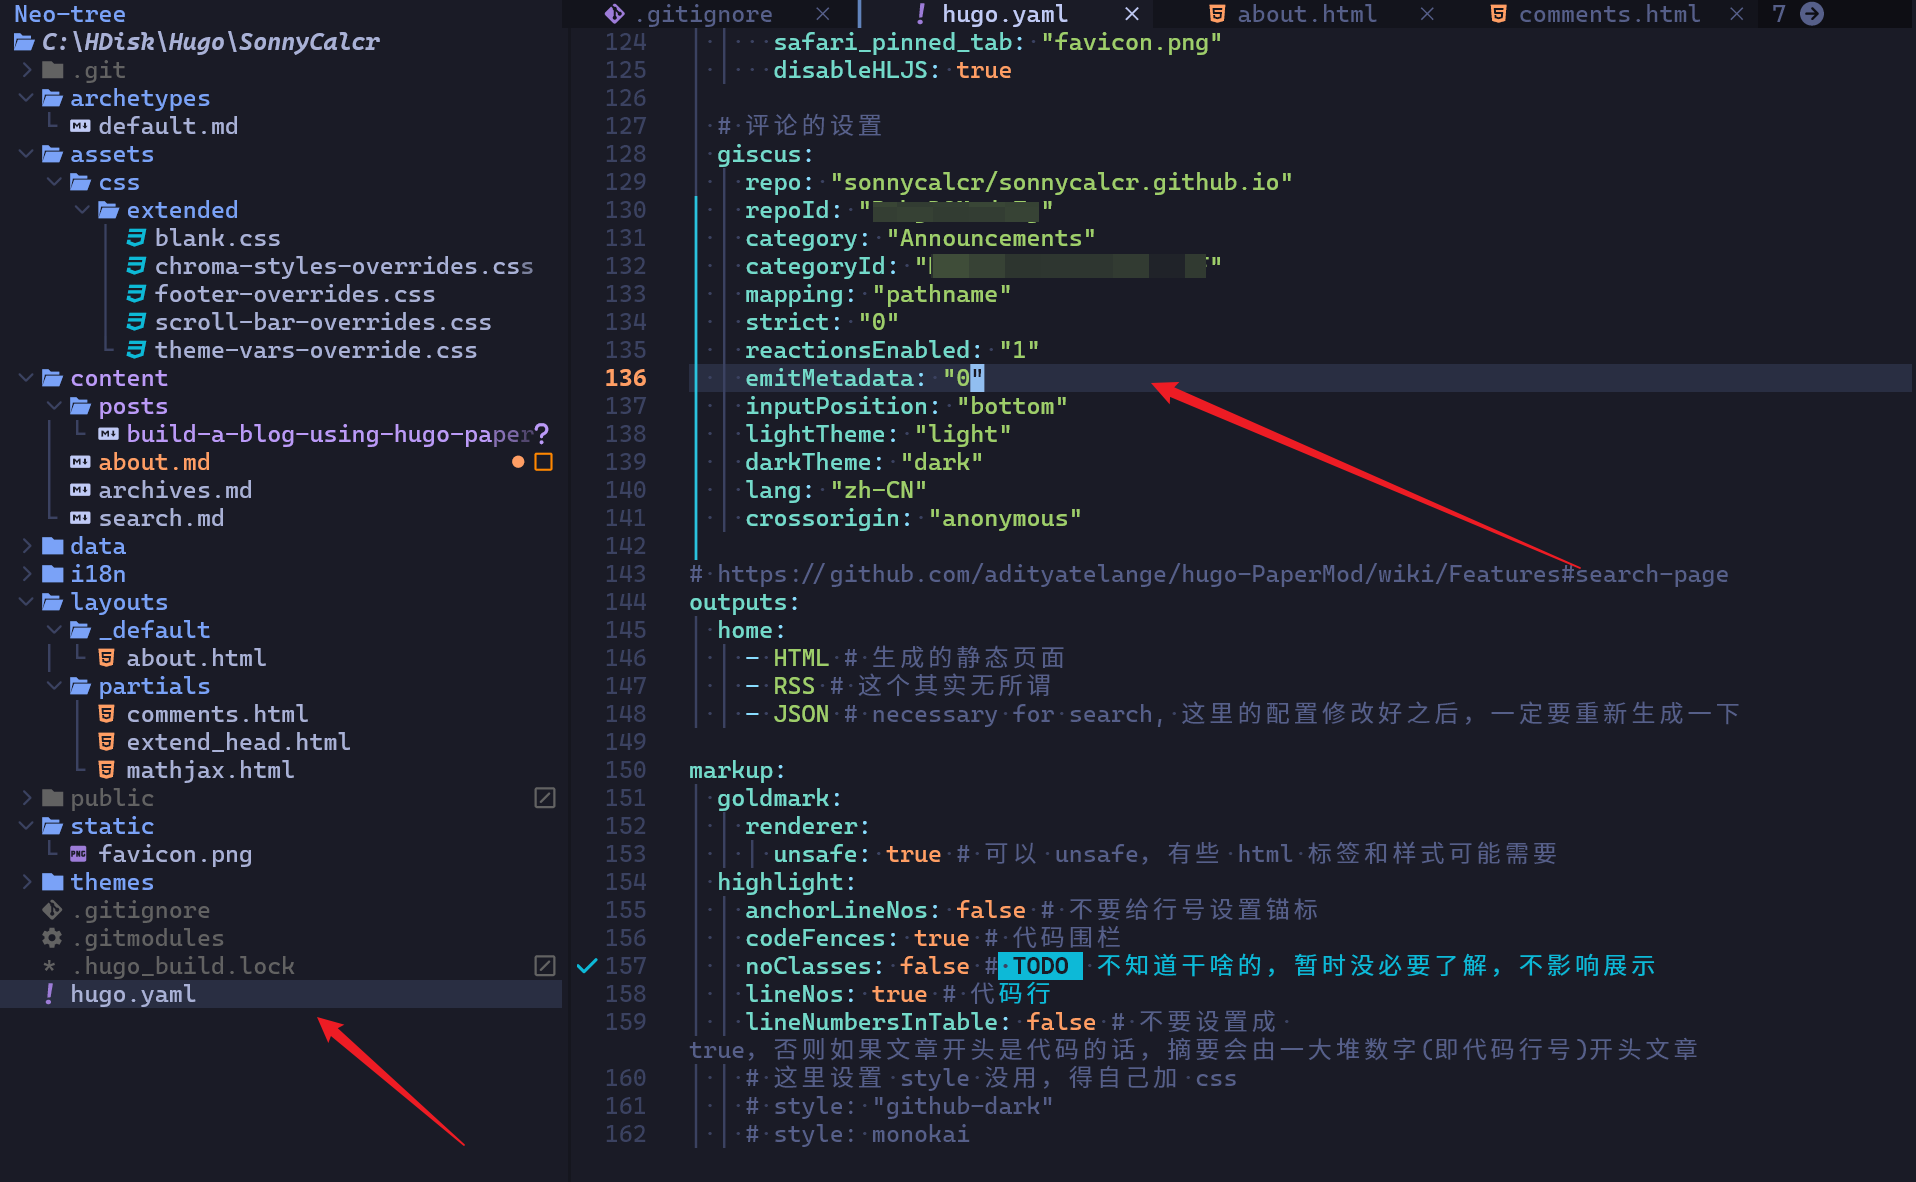
这样就可以正常使用了。
配置数学公式
这里使用的是 mathjax。
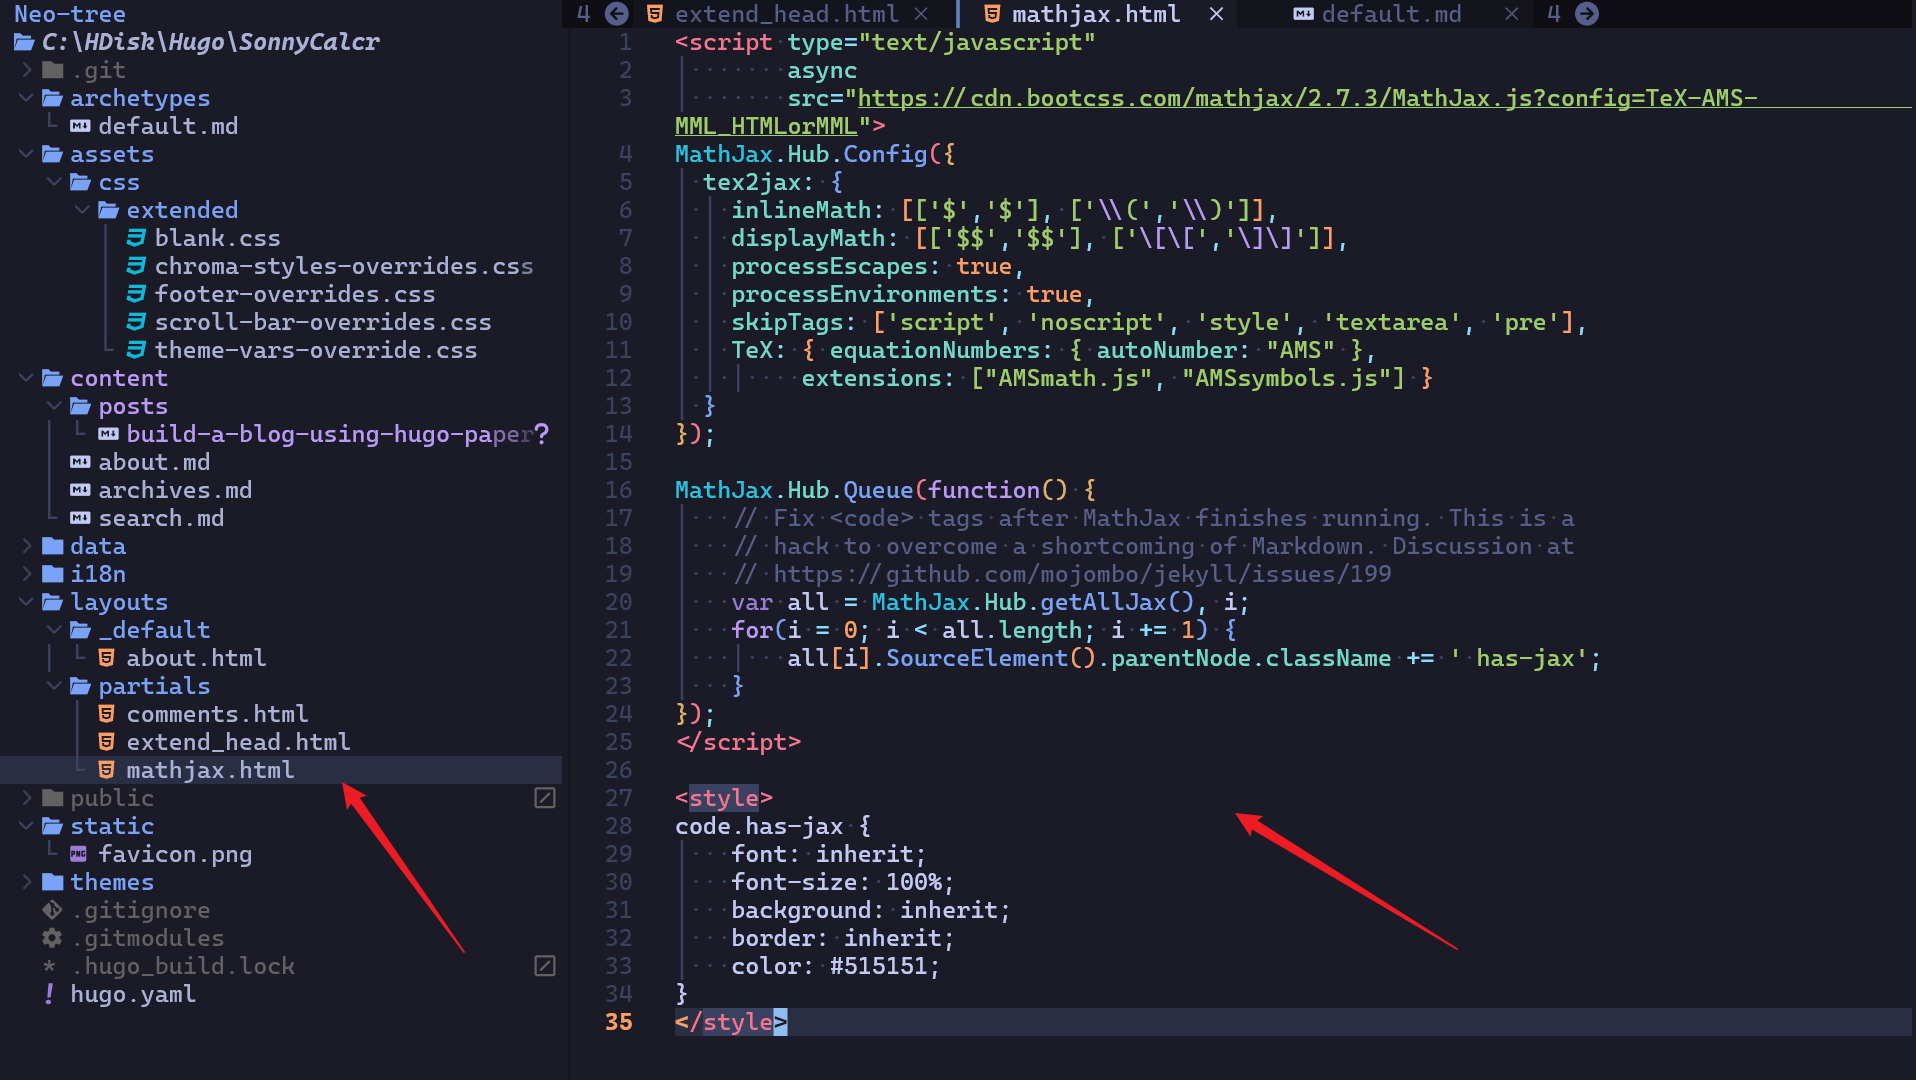
我们需要添加两个文件,一个是 layouts\partials 下的 mathjax.html 文件,如下,
 1<script type="text/javascript"
 2        async
 3        src="https://cdn.bootcss.com/mathjax/2.7.3/MathJax.js?config=TeX-AMS-MML_HTMLorMML">
 4MathJax.Hub.Config({
 5  tex2jax: {
 6    inlineMath: [['$','$'], ['\\(','\\)']],
 7    displayMath: [['$$','$$'], ['\[\[','\]\]']],
 8    processEscapes: true,
 9    processEnvironments: true,
10    skipTags: ['script', 'noscript', 'style', 'textarea', 'pre'],
11    TeX: { equationNumbers: { autoNumber: "AMS" },
12         extensions: ["AMSmath.js", "AMSsymbols.js"] }
13  }
14});
15
16MathJax.Hub.Queue(function() {
17    // Fix <code> tags after MathJax finishes running. This is a
18    // hack to overcome a shortcoming of Markdown. Discussion at
19    // https://github.com/mojombo/jekyll/issues/199
20    var all = MathJax.Hub.getAllJax(), i;
21    for(i = 0; i < all.length; i += 1) {
22        all[i].SourceElement().parentNode.className += ' has-jax';
23    }
24});
25</script>
26
27<style>
28code.has-jax {
29    font: inherit;
30    font-size: 100%;
31    background: inherit;
32    border: inherit;
33    color: #515151;
34}
35</style>
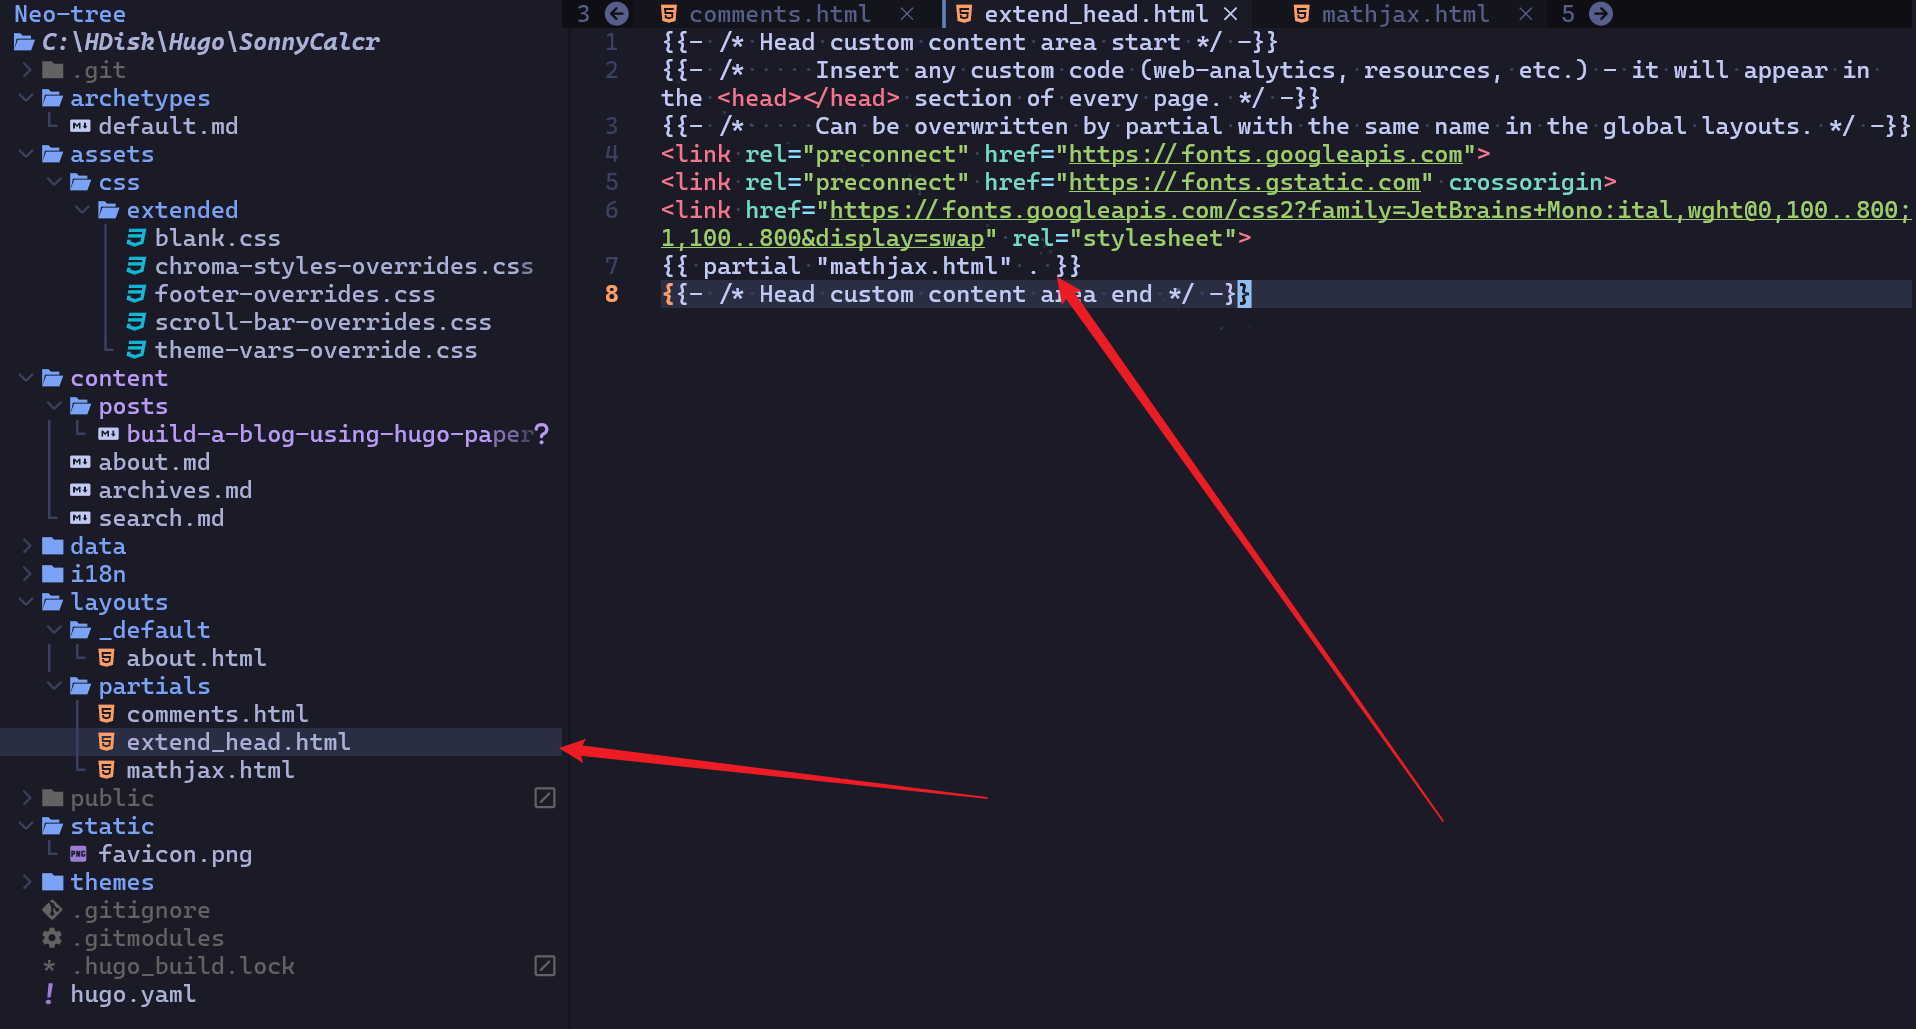
另一个是 layouts\partials 下的 extend_head.html 文件,
1{{- /* Head custom content area start */ -}}
2{{- /*     Insert any custom code (web-analytics, resources, etc.) - it will appear in the <head></head> section of every page. */ -}}
3{{- /*     Can be overwritten by partial with the same name in the global layouts. */ -}}
4{{ partial "mathjax.html" . }}
5{{- /* Head custom content area end */ -}}
到这里,数学公式就可以正常使用了,我们来写一点数学公式试一下,
 1行内数学公式:$a^2 + b^2 = c^2$。
 2
 3块公式,
 4
 5$$
 6a^2 + b^2 = c^2
 7$$
 8
 9<div>
10$$
11\boldsymbol{x}_{i+1}+\boldsymbol{x}_{i+2}=\boldsymbol{x}_{i+3}
12$$
13</div>
渲染出来的效果如下,
行内数学公式:$a^2 + b^2 = c^2$。
块公式,
$$ a^2 + b^2 = c^2 $$
上面的第二个公式之所以要用 div 包裹起来,是因为这里的数学公式如果有超过了三对花括号,那么,其解析和转义就会出问题,这个和 hugo 有关目前折中的方案就是上面这种在外面套一层 div。
给代码换个字体
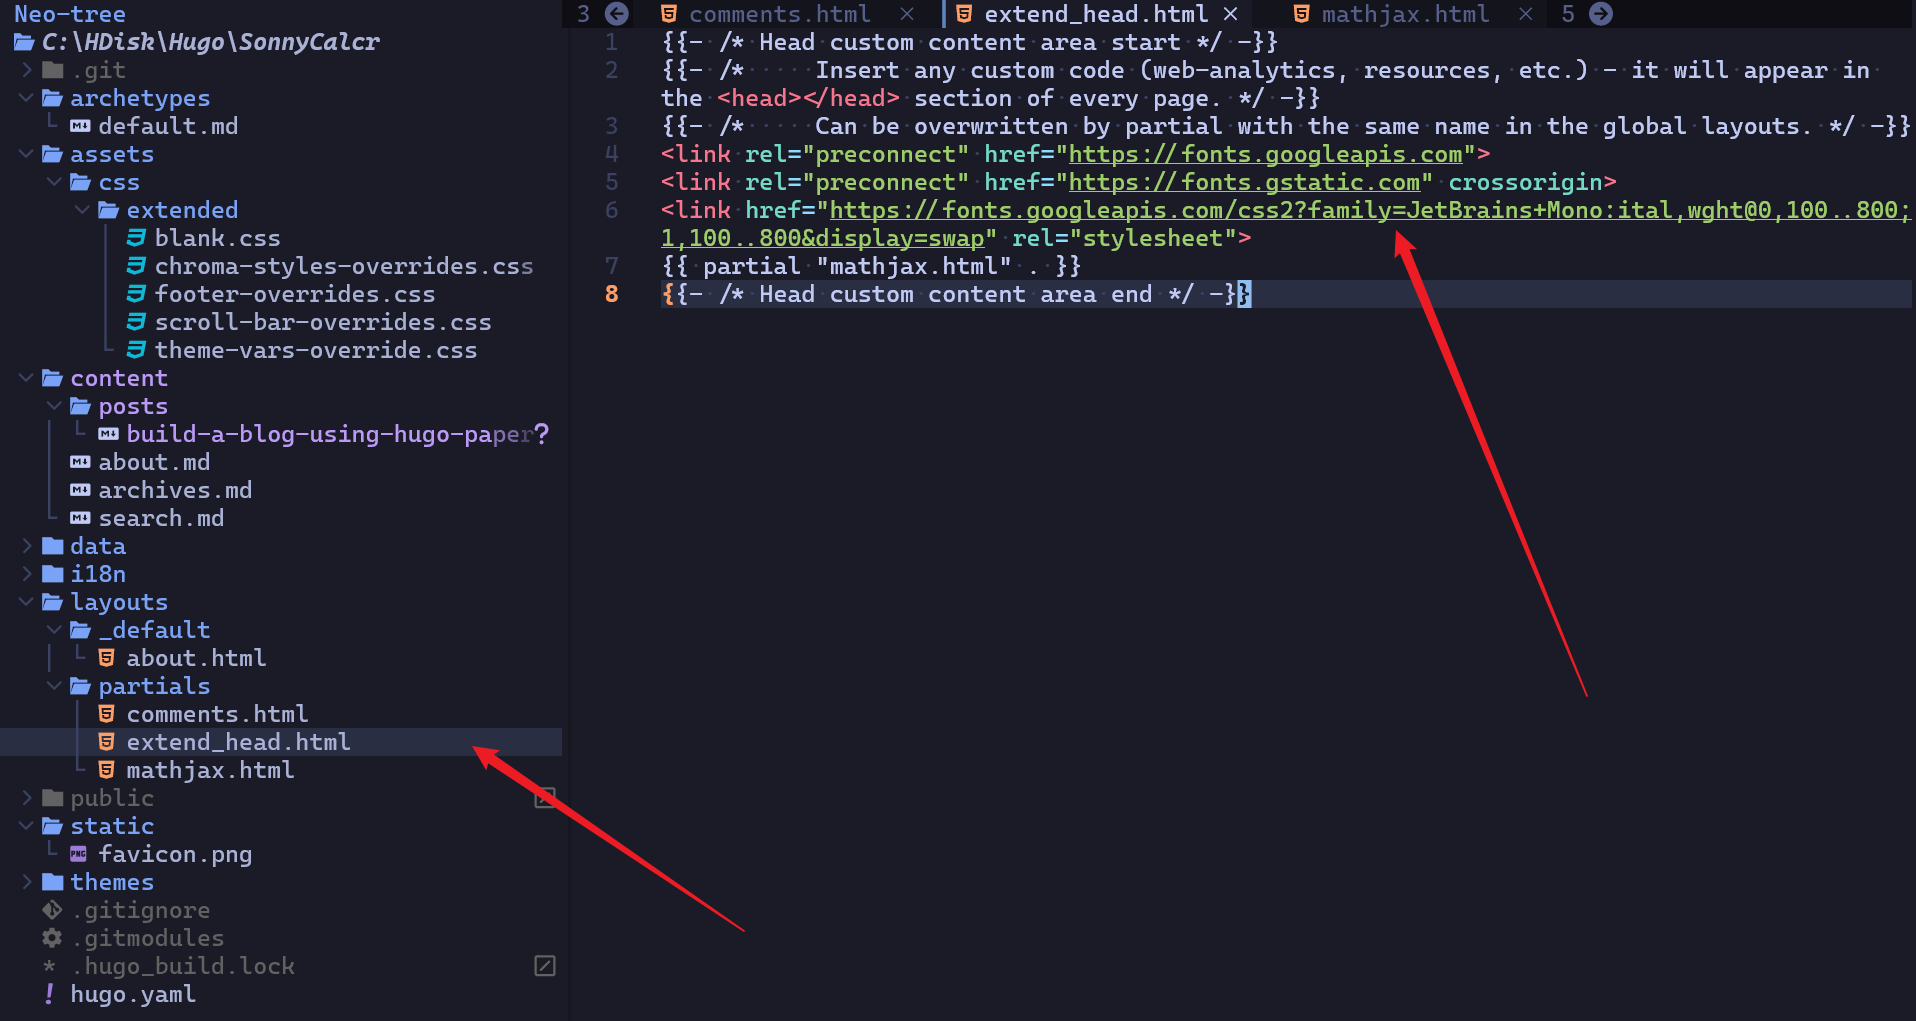
先到谷歌字体 中找一款开源字体,我这里选用的是 Jetbrains Mono,然后复制其信息到 layouts\partials\extend_head.html 中,
1<link rel="preconnect" href="https://fonts.googleapis.com">
2<link rel="preconnect" href="https://fonts.gstatic.com" crossorigin>
3<link href="https://fonts.googleapis.com/css2?family=JetBrains+Mono:ital,wght@0,100..800;1,100..800&display=swap" rel="stylesheet">
然后,新建一个 assets\css\extended\blank.css 文件,添加样式如下,
1.post-content pre,
2code {
3  font-family: "JetBrains Mono", monospace;
4  font-size: 1rem;
5  line-height: 1.2;
6}
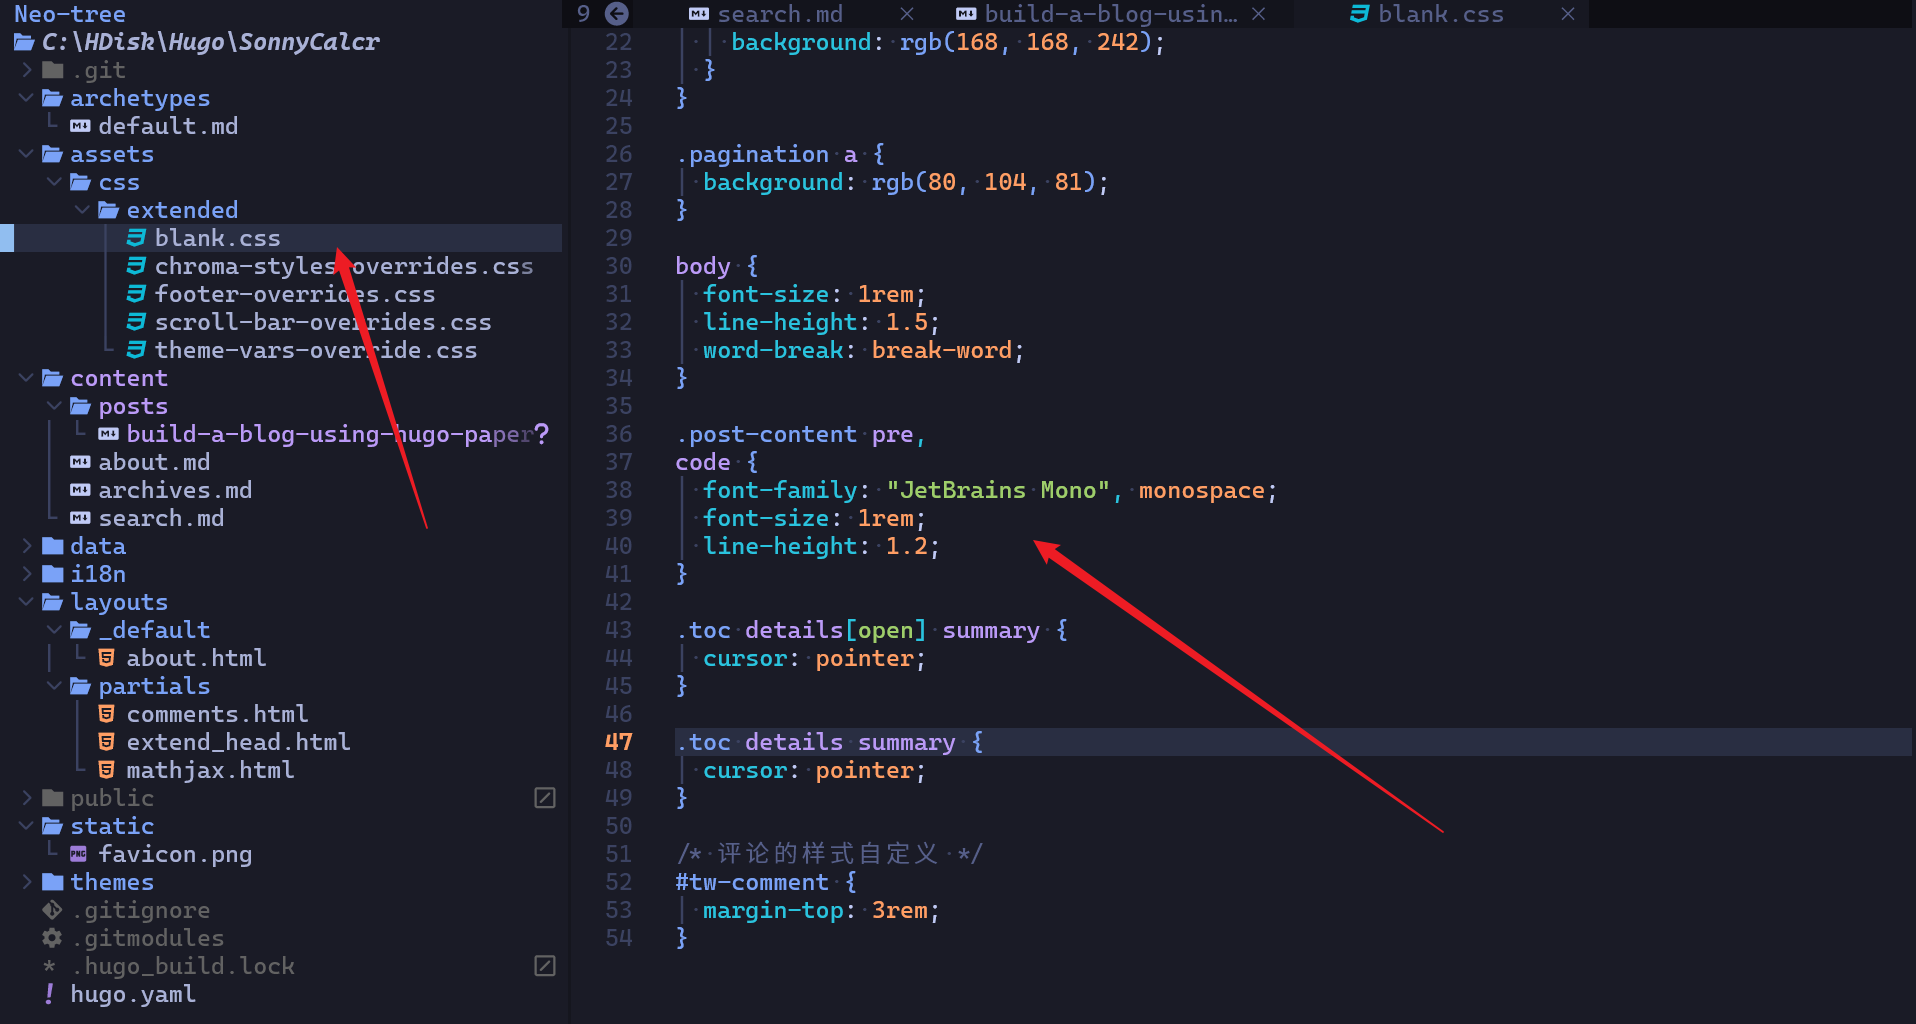
这样就可以生效了,如果发现不生效,可以重新执行一下 hugo server 试试。
代码明暗样式切换
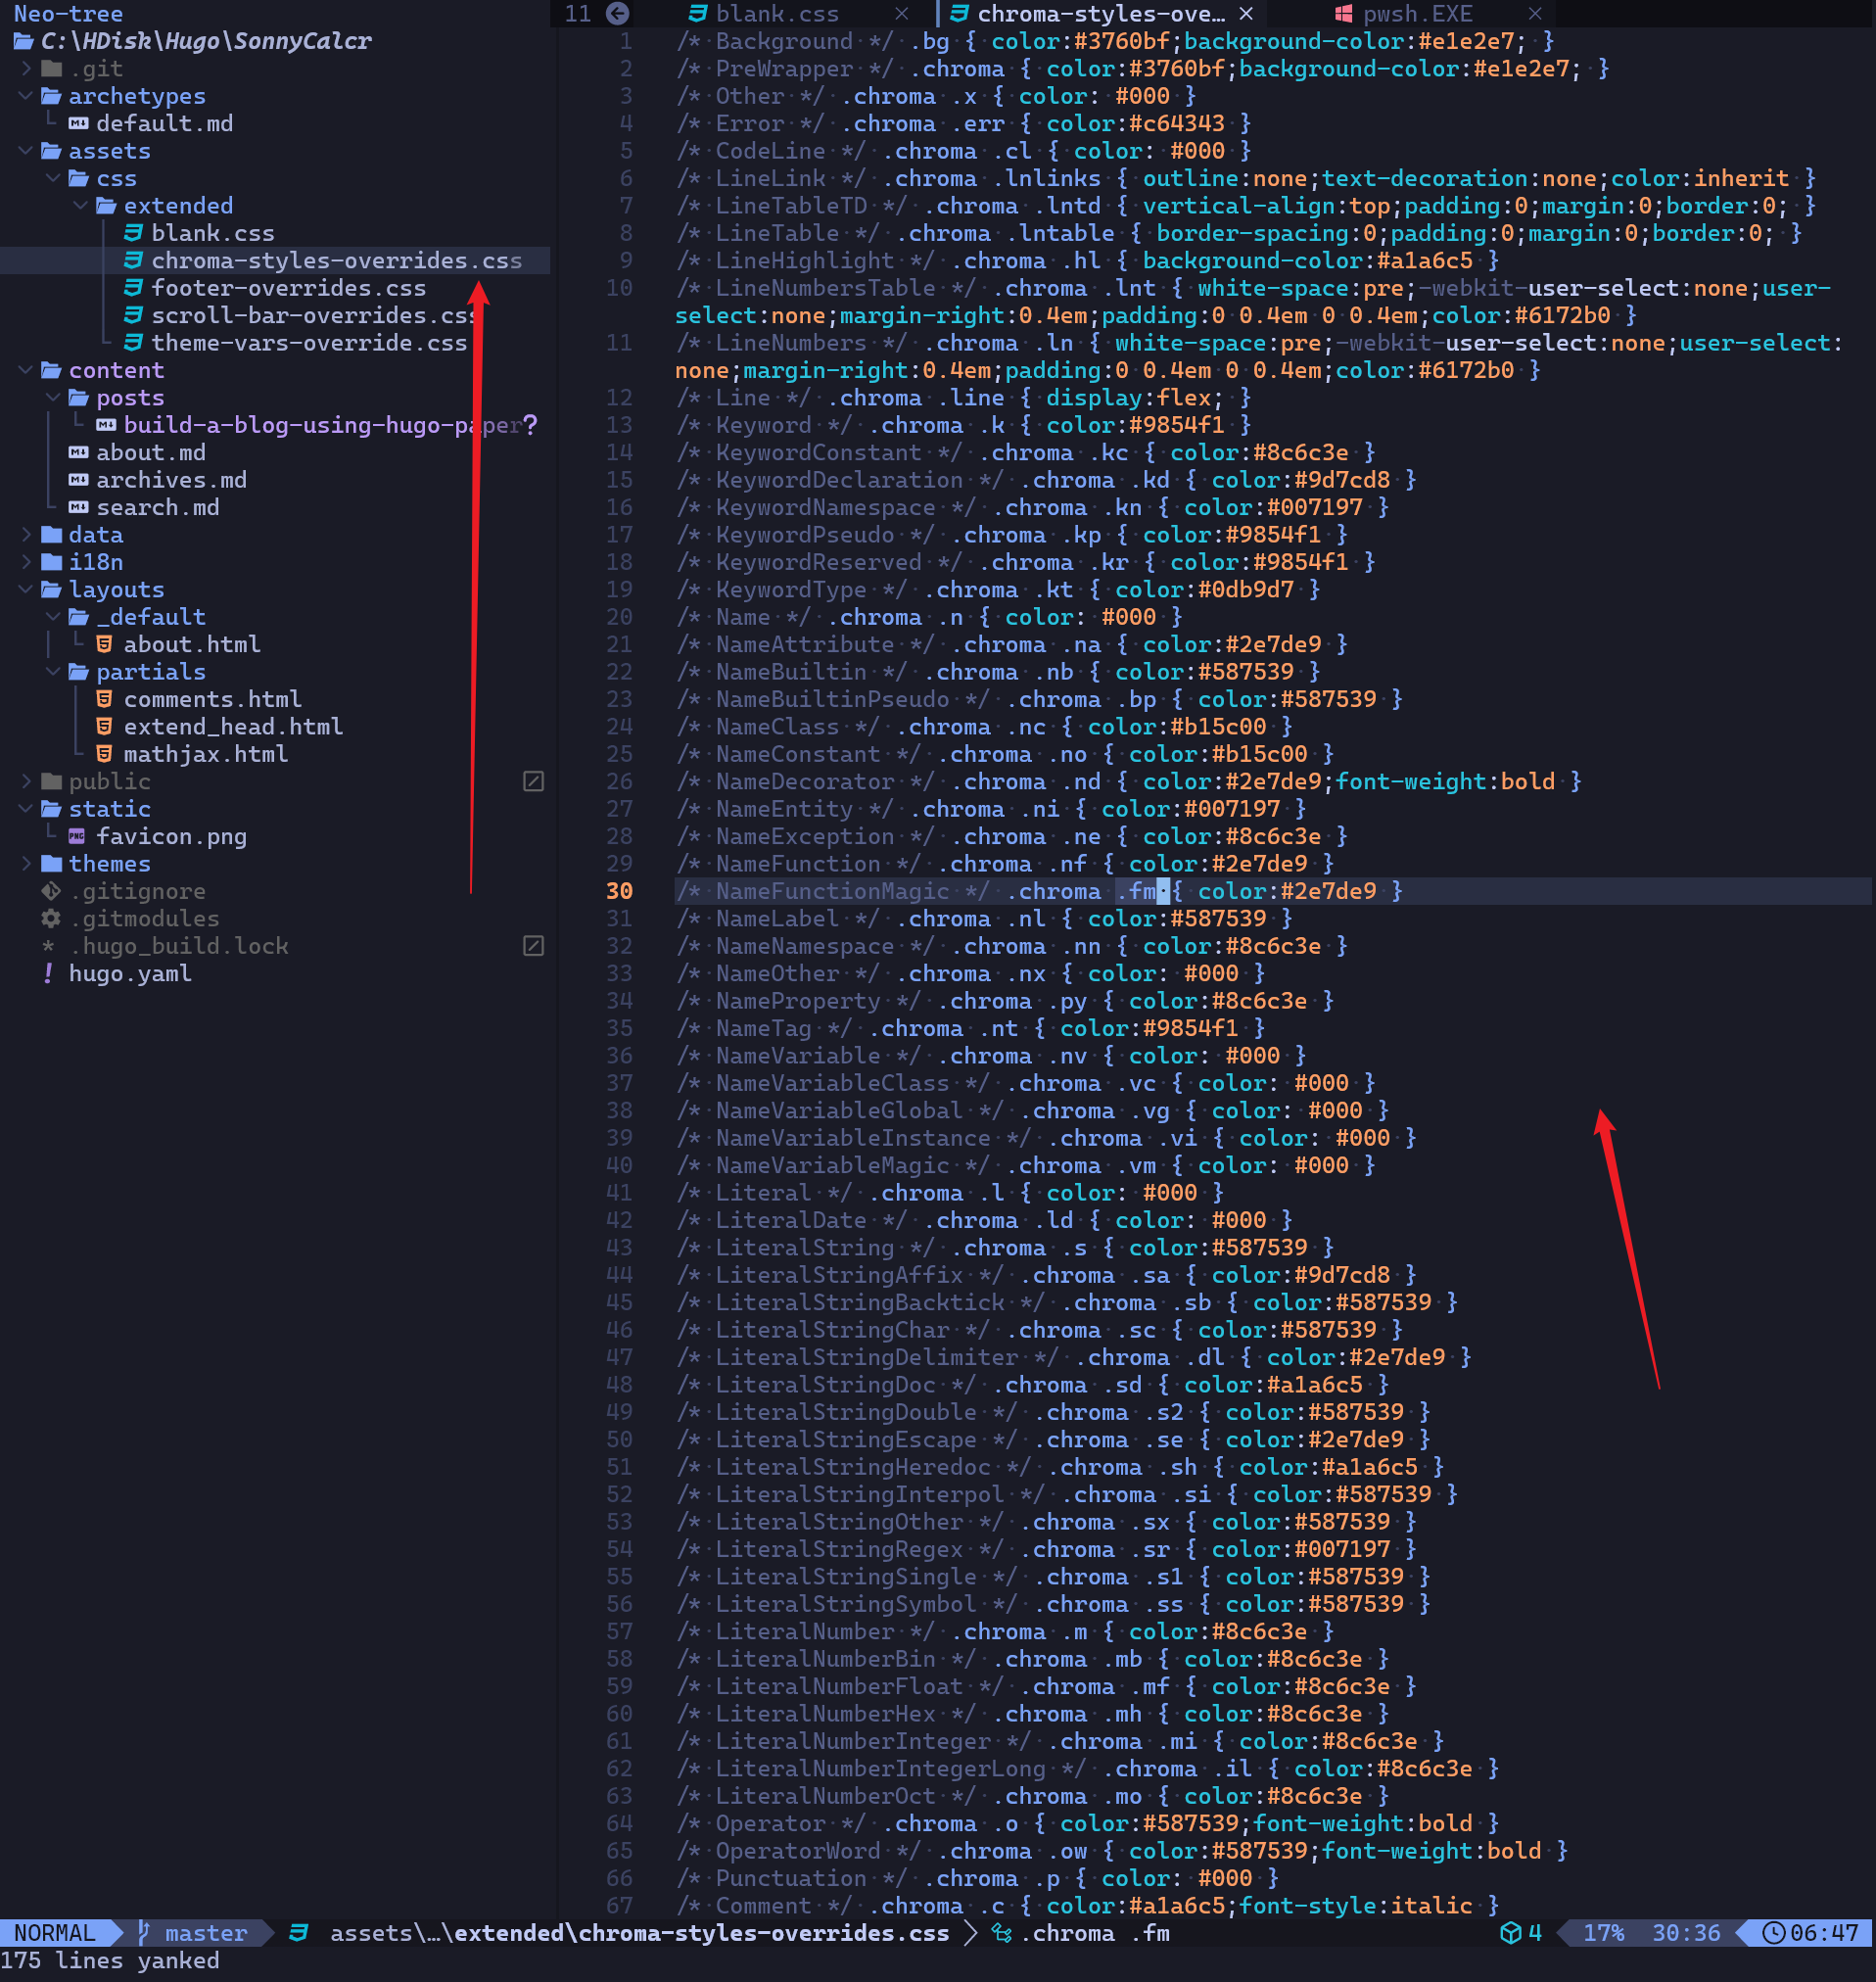
我这里使用的不是 highlightjs,而是 hugo 推荐的 chroma,这样的话,我们先建立一个 assets\css\extended\chroma-styles-overrides.css 文件,
然后,执行一下命令生成你想要的样式,
1hugo gen chromastyles --style=tokyonight-day > syntax.css
然后,把 syntax.css 中的内容复制到 chroma-styles-overrides.html 文件中,如果是暗色主题,那么,生成的样式则要包裹在 .dark {} 里面,我这里生成了两个样式,白天的样式是 tokyonight-day,黑暗的样式是 github-dark,同时,要记得将生成的样式中有些空缺的部分给补上默认的颜色,我这里白天的颜色补的是黑色,夜晚的颜色补的是白色,不然代码的样式会出问题,我这里完整的样式如下,
  1/* Background */ .bg { color:#3760bf;background-color:#e1e2e7; }
  2/* PreWrapper */ .chroma { color:#3760bf;background-color:#e1e2e7; }
  3/* Other */ .chroma .x { color: #000 }
  4/* Error */ .chroma .err { color:#c64343 }
  5/* CodeLine */ .chroma .cl { color: #000 }
  6/* LineLink */ .chroma .lnlinks { outline:none;text-decoration:none;color:inherit }
  7/* LineTableTD */ .chroma .lntd { vertical-align:top;padding:0;margin:0;border:0; }
  8/* LineTable */ .chroma .lntable { border-spacing:0;padding:0;margin:0;border:0; }
  9/* LineHighlight */ .chroma .hl { background-color:#a1a6c5 }
 10/* LineNumbersTable */ .chroma .lnt { white-space:pre;-webkit-user-select:none;user-select:none;margin-right:0.4em;padding:0 0.4em 0 0.4em;color:#6172b0 }
 11/* LineNumbers */ .chroma .ln { white-space:pre;-webkit-user-select:none;user-select:none;margin-right:0.4em;padding:0 0.4em 0 0.4em;color:#6172b0 }
 12/* Line */ .chroma .line { display:flex; }
 13/* Keyword */ .chroma .k { color:#9854f1 }
 14/* KeywordConstant */ .chroma .kc { color:#8c6c3e }
 15/* KeywordDeclaration */ .chroma .kd { color:#9d7cd8 }
 16/* KeywordNamespace */ .chroma .kn { color:#007197 }
 17/* KeywordPseudo */ .chroma .kp { color:#9854f1 }
 18/* KeywordReserved */ .chroma .kr { color:#9854f1 }
 19/* KeywordType */ .chroma .kt { color:#0db9d7 }
 20/* Name */ .chroma .n { color: #000 }
 21/* NameAttribute */ .chroma .na { color:#2e7de9 }
 22/* NameBuiltin */ .chroma .nb { color:#587539 }
 23/* NameBuiltinPseudo */ .chroma .bp { color:#587539 }
 24/* NameClass */ .chroma .nc { color:#b15c00 }
 25/* NameConstant */ .chroma .no { color:#b15c00 }
 26/* NameDecorator */ .chroma .nd { color:#2e7de9;font-weight:bold }
 27/* NameEntity */ .chroma .ni { color:#007197 }
 28/* NameException */ .chroma .ne { color:#8c6c3e }
 29/* NameFunction */ .chroma .nf { color:#2e7de9 }
 30/* NameFunctionMagic */ .chroma .fm { color:#2e7de9 }
 31/* NameLabel */ .chroma .nl { color:#587539 }
 32/* NameNamespace */ .chroma .nn { color:#8c6c3e }
 33/* NameOther */ .chroma .nx { color: #000 }
 34/* NameProperty */ .chroma .py { color:#8c6c3e }
 35/* NameTag */ .chroma .nt { color:#9854f1 }
 36/* NameVariable */ .chroma .nv { color: #000 }
 37/* NameVariableClass */ .chroma .vc { color: #000 }
 38/* NameVariableGlobal */ .chroma .vg { color: #000 }
 39/* NameVariableInstance */ .chroma .vi { color: #000 }
 40/* NameVariableMagic */ .chroma .vm { color: #000 }
 41/* Literal */ .chroma .l { color: #000 }
 42/* LiteralDate */ .chroma .ld { color: #000 }
 43/* LiteralString */ .chroma .s { color:#587539 }
 44/* LiteralStringAffix */ .chroma .sa { color:#9d7cd8 }
 45/* LiteralStringBacktick */ .chroma .sb { color:#587539 }
 46/* LiteralStringChar */ .chroma .sc { color:#587539 }
 47/* LiteralStringDelimiter */ .chroma .dl { color:#2e7de9 }
 48/* LiteralStringDoc */ .chroma .sd { color:#a1a6c5 }
 49/* LiteralStringDouble */ .chroma .s2 { color:#587539 }
 50/* LiteralStringEscape */ .chroma .se { color:#2e7de9 }
 51/* LiteralStringHeredoc */ .chroma .sh { color:#a1a6c5 }
 52/* LiteralStringInterpol */ .chroma .si { color:#587539 }
 53/* LiteralStringOther */ .chroma .sx { color:#587539 }
 54/* LiteralStringRegex */ .chroma .sr { color:#007197 }
 55/* LiteralStringSingle */ .chroma .s1 { color:#587539 }
 56/* LiteralStringSymbol */ .chroma .ss { color:#587539 }
 57/* LiteralNumber */ .chroma .m { color:#8c6c3e }
 58/* LiteralNumberBin */ .chroma .mb { color:#8c6c3e }
 59/* LiteralNumberFloat */ .chroma .mf { color:#8c6c3e }
 60/* LiteralNumberHex */ .chroma .mh { color:#8c6c3e }
 61/* LiteralNumberInteger */ .chroma .mi { color:#8c6c3e }
 62/* LiteralNumberIntegerLong */ .chroma .il { color:#8c6c3e }
 63/* LiteralNumberOct */ .chroma .mo { color:#8c6c3e }
 64/* Operator */ .chroma .o { color:#587539;font-weight:bold }
 65/* OperatorWord */ .chroma .ow { color:#587539;font-weight:bold }
 66/* Punctuation */ .chroma .p { color: #000 }
 67/* Comment */ .chroma .c { color:#a1a6c5;font-style:italic }
 68/* CommentHashbang */ .chroma .ch { color:#a1a6c5;font-style:italic }
 69/* CommentMultiline */ .chroma .cm { color:#a1a6c5;font-style:italic }
 70/* CommentSingle */ .chroma .c1 { color:#a1a6c5;font-style:italic }
 71/* CommentSpecial */ .chroma .cs { color:#a1a6c5;font-style:italic }
 72/* CommentPreproc */ .chroma .cp { color:#a1a6c5;font-style:italic }
 73/* CommentPreprocFile */ .chroma .cpf { color:#a1a6c5;font-weight:bold;font-style:italic }
 74/* Generic */ .chroma .g { color: #000 }
 75/* GenericDeleted */ .chroma .gd { color:#c64343;background-color:#e9e9ed }
 76/* GenericEmph */ .chroma .ge { font-style:italic }
 77/* GenericError */ .chroma .gr { color:#c64343 }
 78/* GenericHeading */ .chroma .gh { color:#8c6c3e;font-weight:bold }
 79/* GenericInserted */ .chroma .gi { color:#587539;background-color:#e9e9ed }
 80/* GenericOutput */ .chroma .go { color: #000 }
 81/* GenericPrompt */ .chroma .gp { color: #000 }
 82/* GenericStrong */ .chroma .gs { font-weight:bold }
 83/* GenericSubheading */ .chroma .gu { color:#8c6c3e;font-weight:bold }
 84/* GenericTraceback */ .chroma .gt { color:#c64343 }
 85/* GenericUnderline */ .chroma .gl { text-decoration:underline }
 86/* TextWhitespace */ .chroma .w { color: #000 }
 87
 88.dark {
 89  /* Background */ .bg { color:#e6edf3;background-color:#0d1117; }
 90  /* PreWrapper */ .chroma { color:#e6edf3;background-color:#0d1117; }
 91  /* Other */ .chroma .x { color: #fff }
 92  /* Error */ .chroma .err { color:#f85149 }
 93  /* CodeLine */ .chroma .cl { color: #fff }
 94  /* LineLink */ .chroma .lnlinks { outline:none;text-decoration:none;color:inherit }
 95  /* LineTableTD */ .chroma .lntd { vertical-align:top;padding:0;margin:0;border:0; }
 96  /* LineTable */ .chroma .lntable { border-spacing:0;padding:0;margin:0;border:0; }
 97  /* LineHighlight */ .chroma .hl { background-color:#6e7681 }
 98  /* LineNumbersTable */ .chroma .lnt { white-space:pre;-webkit-user-select:none;user-select:none;margin-right:0.4em;padding:0 0.4em 0 0.4em;color:#737679 }
 99  /* LineNumbers */ .chroma .ln { white-space:pre;-webkit-user-select:none;user-select:none;margin-right:0.4em;padding:0 0.4em 0 0.4em;color:#6e7681 }
100  /* Line */ .chroma .line { display:flex; }
101  /* Keyword */ .chroma .k { color:#ff7b72 }
102  /* KeywordConstant */ .chroma .kc { color:#79c0ff }
103  /* KeywordDeclaration */ .chroma .kd { color:#ff7b72 }
104  /* KeywordNamespace */ .chroma .kn { color:#ff7b72 }
105  /* KeywordPseudo */ .chroma .kp { color:#79c0ff }
106  /* KeywordReserved */ .chroma .kr { color:#ff7b72 }
107  /* KeywordType */ .chroma .kt { color:#ff7b72 }
108  /* Name */ .chroma .n { color: #fff }
109  /* NameAttribute */ .chroma .na { color: #fff }
110  /* NameBuiltin */ .chroma .nb { color: #fff }
111  /* NameBuiltinPseudo */ .chroma .bp { color: #fff }
112  /* NameClass */ .chroma .nc { color:#f0883e;font-weight:bold }
113  /* NameConstant */ .chroma .no { color:#79c0ff;font-weight:bold }
114  /* NameDecorator */ .chroma .nd { color:#d2a8ff;font-weight:bold }
115  /* NameEntity */ .chroma .ni { color:#ffa657 }
116  /* NameException */ .chroma .ne { color:#f0883e;font-weight:bold }
117  /* NameFunction */ .chroma .nf { color:#d2a8ff;font-weight:bold }
118  /* NameFunctionMagic */ .chroma .fm { color: #fff }
119  /* NameLabel */ .chroma .nl { color:#79c0ff;font-weight:bold }
120  /* NameNamespace */ .chroma .nn { color:#ff7b72 }
121  /* NameOther */ .chroma .nx { color: #fff }
122  /* NameProperty */ .chroma .py { color:#79c0ff }
123  /* NameTag */ .chroma .nt { color:#7ee787 }
124  /* NameVariable */ .chroma .nv { color:#79c0ff }
125  /* NameVariableClass */ .chroma .vc { color: #fff }
126  /* NameVariableGlobal */ .chroma .vg { color: #fff }
127  /* NameVariableInstance */ .chroma .vi { color: #fff }
128  /* NameVariableMagic */ .chroma .vm { color: #fff }
129  /* Literal */ .chroma .l { color:#a5d6ff }
130  /* LiteralDate */ .chroma .ld { color:#79c0ff }
131  /* LiteralString */ .chroma .s { color:#a5d6ff }
132  /* LiteralStringAffix */ .chroma .sa { color:#79c0ff }
133  /* LiteralStringBacktick */ .chroma .sb { color:#a5d6ff }
134  /* LiteralStringChar */ .chroma .sc { color:#a5d6ff }
135  /* LiteralStringDelimiter */ .chroma .dl { color:#79c0ff }
136  /* LiteralStringDoc */ .chroma .sd { color:#a5d6ff }
137  /* LiteralStringDouble */ .chroma .s2 { color:#a5d6ff }
138  /* LiteralStringEscape */ .chroma .se { color:#79c0ff }
139  /* LiteralStringHeredoc */ .chroma .sh { color:#79c0ff }
140  /* LiteralStringInterpol */ .chroma .si { color:#a5d6ff }
141  /* LiteralStringOther */ .chroma .sx { color:#a5d6ff }
142  /* LiteralStringRegex */ .chroma .sr { color:#79c0ff }
143  /* LiteralStringSingle */ .chroma .s1 { color:#a5d6ff }
144  /* LiteralStringSymbol */ .chroma .ss { color:#a5d6ff }
145  /* LiteralNumber */ .chroma .m { color:#a5d6ff }
146  /* LiteralNumberBin */ .chroma .mb { color:#a5d6ff }
147  /* LiteralNumberFloat */ .chroma .mf { color:#a5d6ff }
148  /* LiteralNumberHex */ .chroma .mh { color:#a5d6ff }
149  /* LiteralNumberInteger */ .chroma .mi { color:#a5d6ff }
150  /* LiteralNumberIntegerLong */ .chroma .il { color:#a5d6ff }
151  /* LiteralNumberOct */ .chroma .mo { color:#a5d6ff }
152  /* Operator */ .chroma .o { color:#ff7b72;font-weight:bold }
153  /* OperatorWord */ .chroma .ow { color:#ff7b72;font-weight:bold }
154  /* Punctuation */ .chroma .p { color: #fff }
155  /* Comment */ .chroma .c { color:#8b949e;font-style:italic }
156  /* CommentHashbang */ .chroma .ch { color:#8b949e;font-style:italic }
157  /* CommentMultiline */ .chroma .cm { color:#8b949e;font-style:italic }
158  /* CommentSingle */ .chroma .c1 { color:#8b949e;font-style:italic }
159  /* CommentSpecial */ .chroma .cs { color:#8b949e;font-weight:bold;font-style:italic }
160  /* CommentPreproc */ .chroma .cp { color:#8b949e;font-weight:bold;font-style:italic }
161  /* CommentPreprocFile */ .chroma .cpf { color:#8b949e;font-weight:bold;font-style:italic }
162  /* Generic */ .chroma .g { color: #fff }
163  /* GenericDeleted */ .chroma .gd { color:#ffa198;background-color:#490202 }
164  /* GenericEmph */ .chroma .ge { font-style:italic }
165  /* GenericError */ .chroma .gr { color:#ffa198 }
166  /* GenericHeading */ .chroma .gh { color:#79c0ff;font-weight:bold }
167  /* GenericInserted */ .chroma .gi { color:#56d364;background-color:#0f5323 }
168  /* GenericOutput */ .chroma .go { color:#8b949e }
169  /* GenericPrompt */ .chroma .gp { color:#8b949e }
170  /* GenericStrong */ .chroma .gs { font-weight:bold }
171  /* GenericSubheading */ .chroma .gu { color:#79c0ff }
172  /* GenericTraceback */ .chroma .gt { color:#ff7b72 }
173  /* GenericUnderline */ .chroma .gl { text-decoration:underline }
174  /* TextWhitespace */ .chroma .w { color:#6e7681 }
175}
我在上面提到的生成的样式中空缺的部分,可以看一下下面的样例,
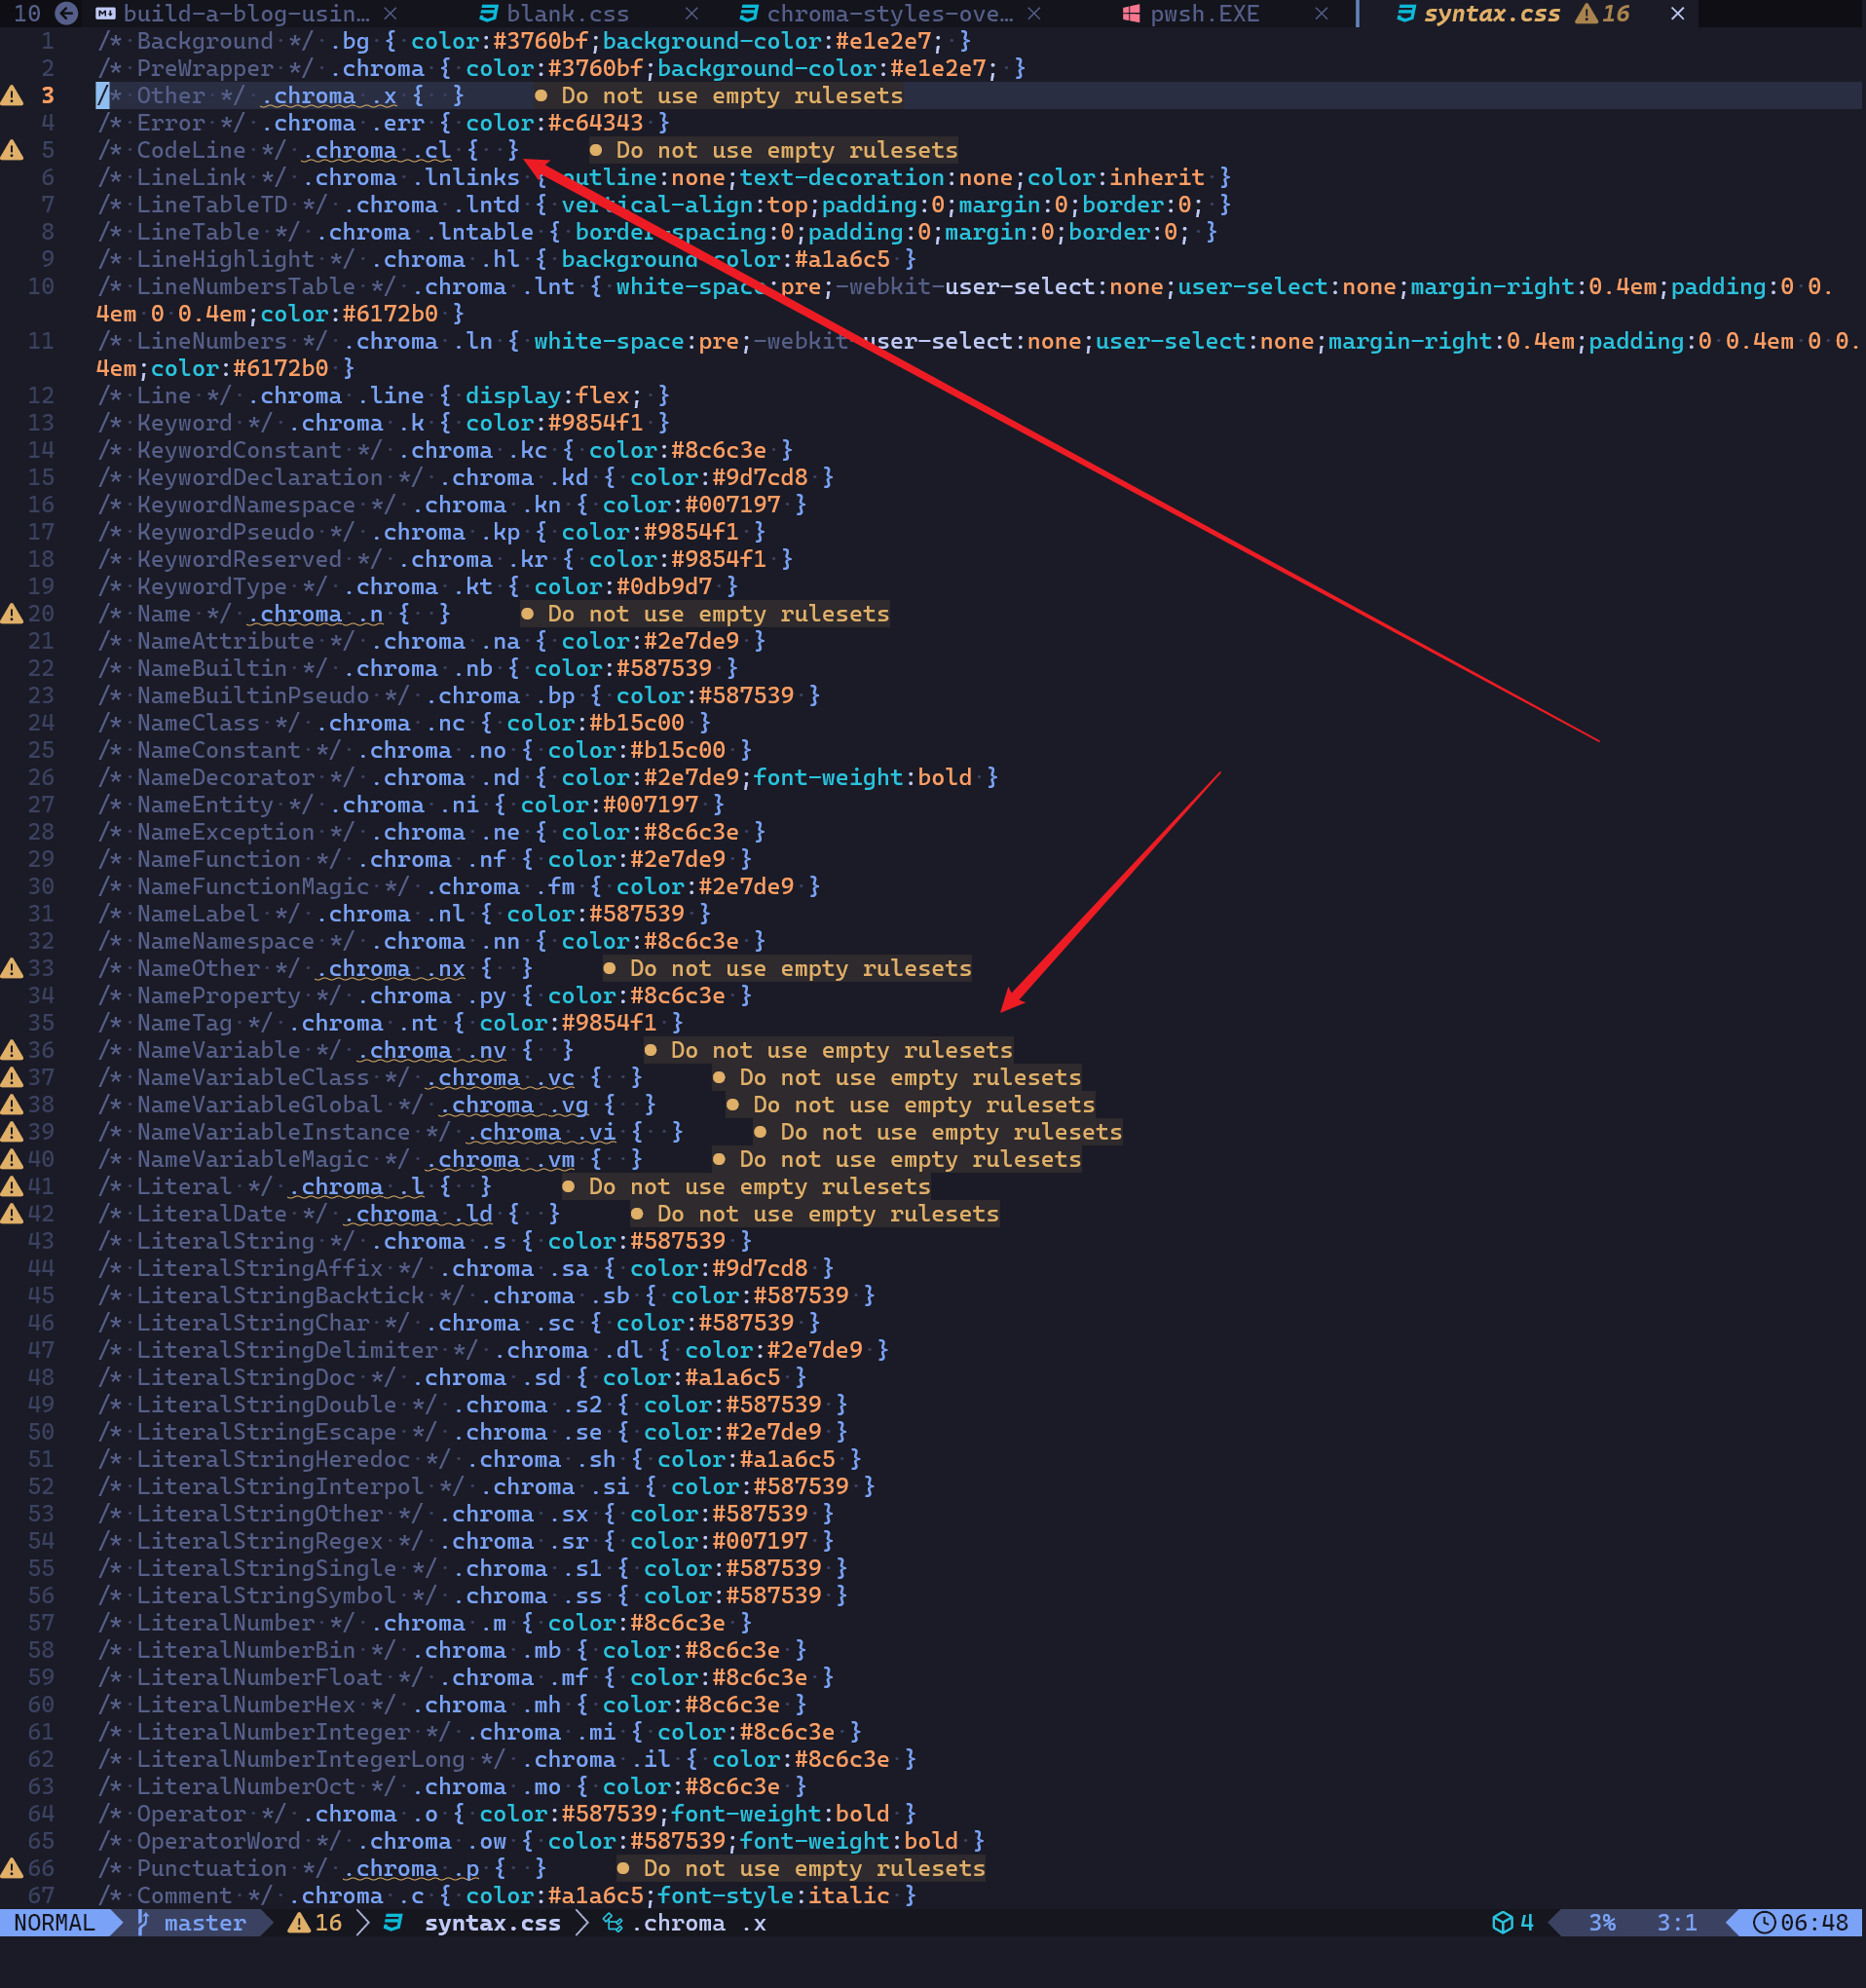
要记得把他们的颜色都补上。
然后,修改一下配置即可,
 1params:
 2  assets:
 3      disableHLJS: true
 4markup:
 5  goldmark:
 6    renderer:
 7      unsafe: true # 可以 unsafe,有些 html 标签和样式可能需要
 8  highlight:
 9    anchorLineNos: false # 不要给行号设置锚标
10    codeFences: true # 代码围栏
11    noClasses: false # TODO: 不知道干啥的,暂时没必要了解,不影响展示
12    lineNos: true # 代码行
13    lineNumbersInTable: false # 不要设置成 true,否则如果文章开头是代码的话,摘要会由一大堆数字(即代码行号)开头文章
14    # 这里设置 style 没用,得自己加 css
15    # style: "github-dark"
16    # style: monokai
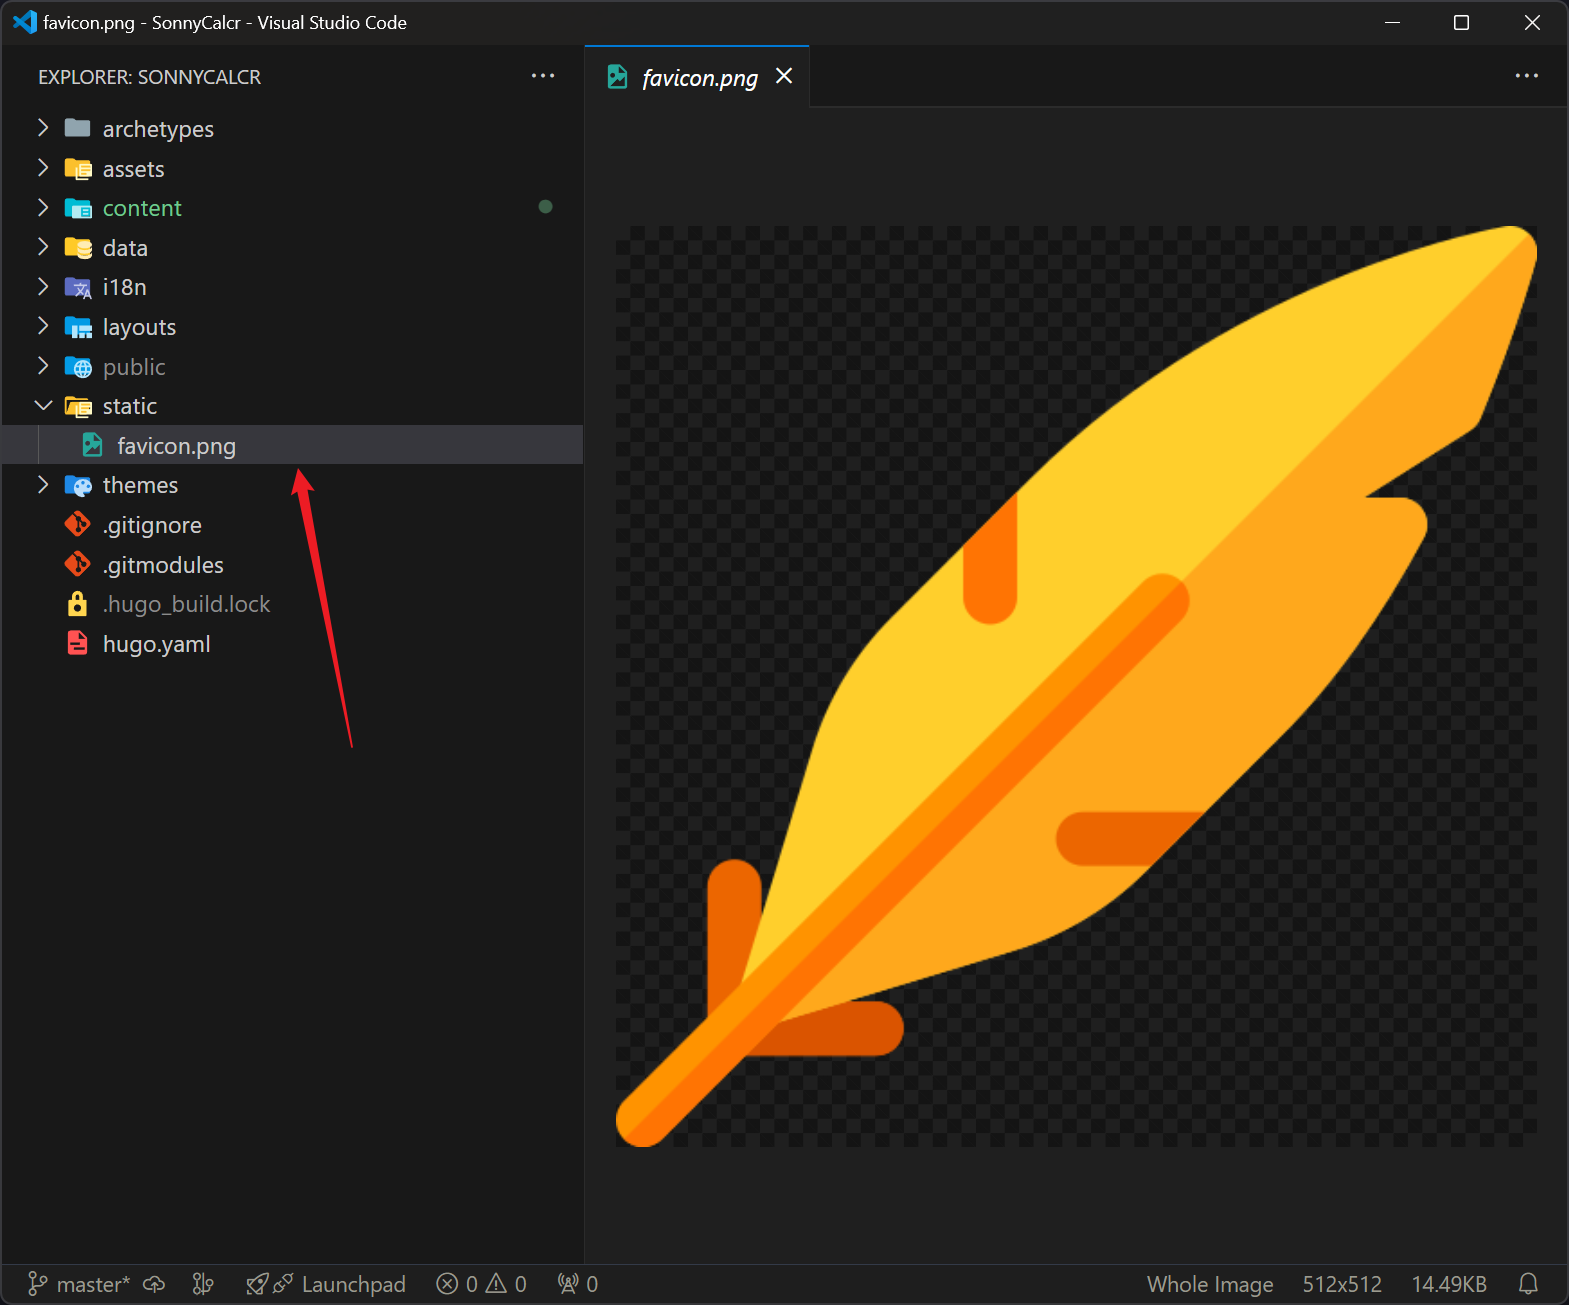
修改网页的 favicon
先到 flaticon 网站中找一个 icon 图片,然后放到 static 目录下,
然后,修改配置,
1params:
2  # 设置网站的标签页的图标,即 favicon
3  assets:
4      favicon: "favicon.png"
5      favicon16x16: "favicon.png"
6      favicon32x32: "favicon.png"
7      apple_touch_icon: "favicon.png"
8      safari_pinned_tab: "favicon.png"
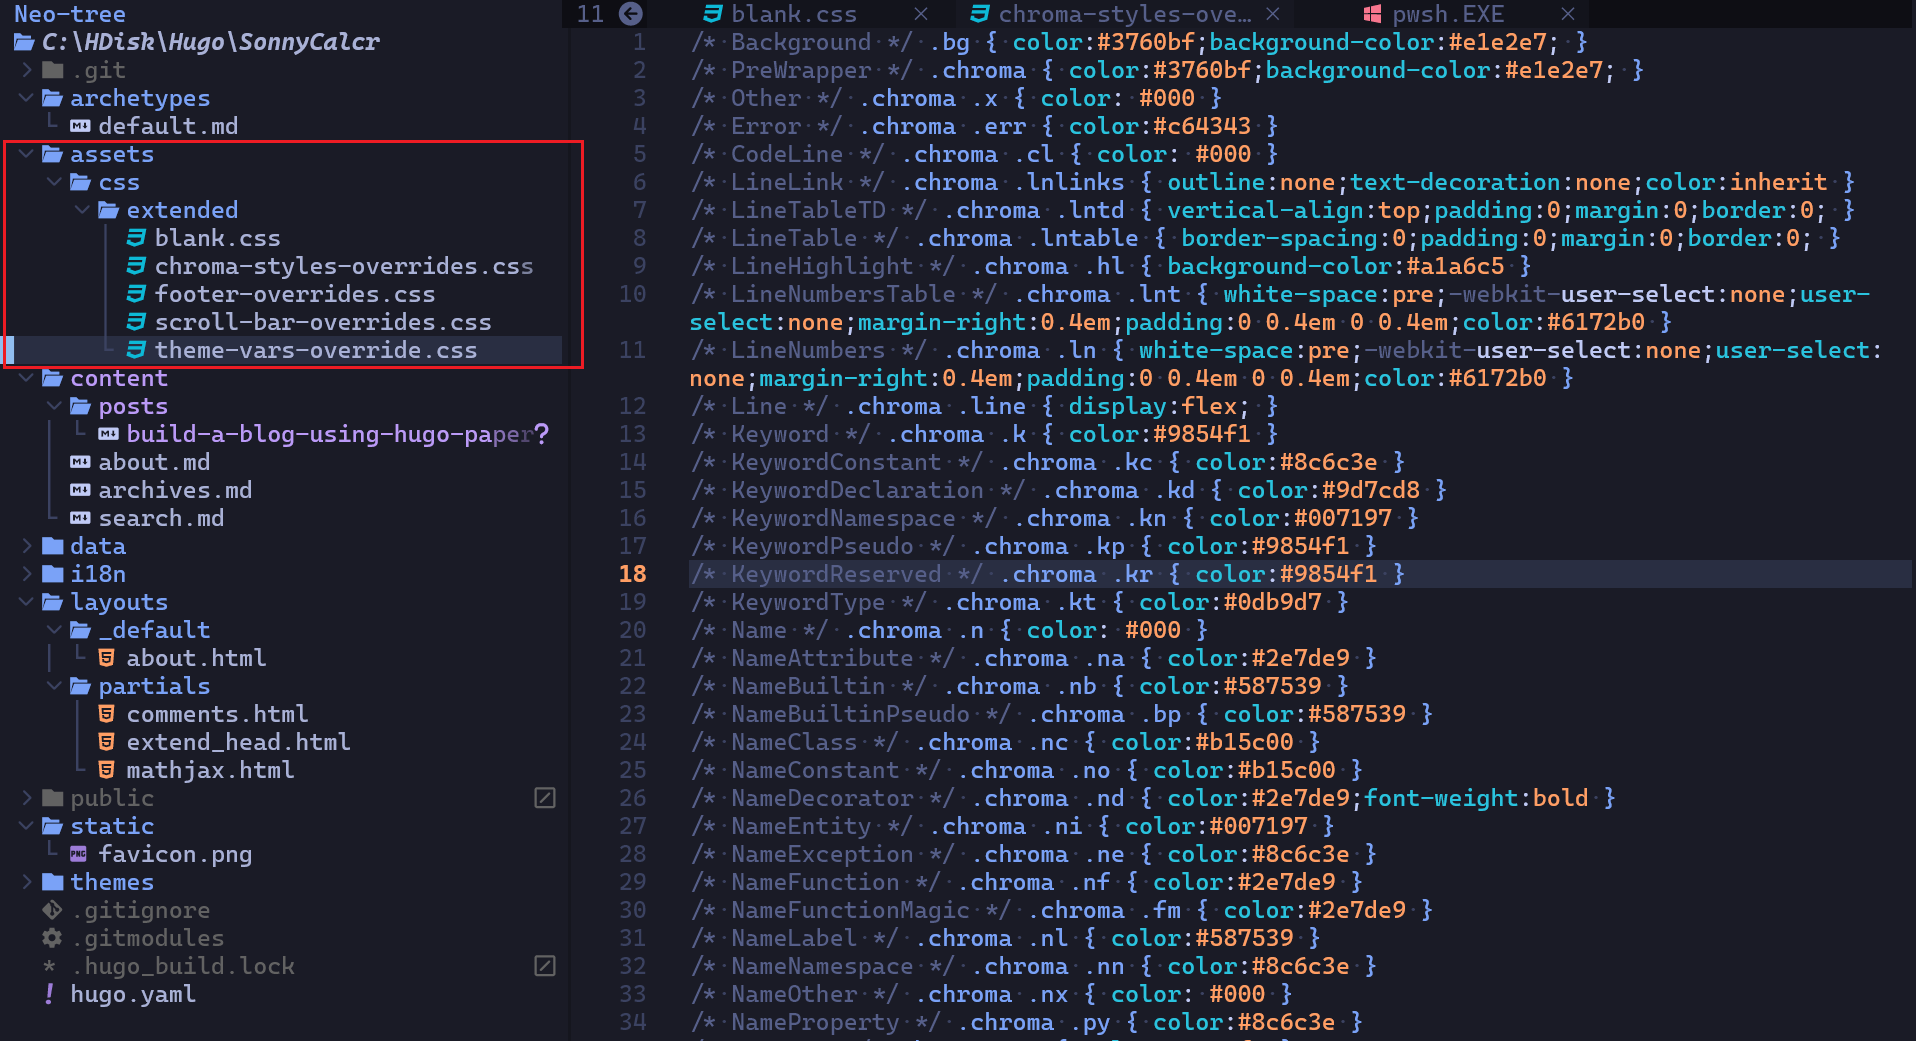
其他一些小的样式修改
这个就直接看我的代码仓库就可以了,修改的基本都是 css,代码都在 assets 目录下,
部署到 Github Pages
这里其实有两种方式,一种是直接建立一个以 username.github.io 为名的 Github 仓库,然后,进行部署,另一种是在此基础上新建一个普通的项目,然后可以挂到 username.github.io 域名的后面。
我们这里就选用简单的第一种比较直接的方式。
新建一个仓库,没有什么好说的,然后把我们当前的这个仓库和远程仓库关联起来,然后推送过去。然后按照 Hugo 的文档指导来操作即可。
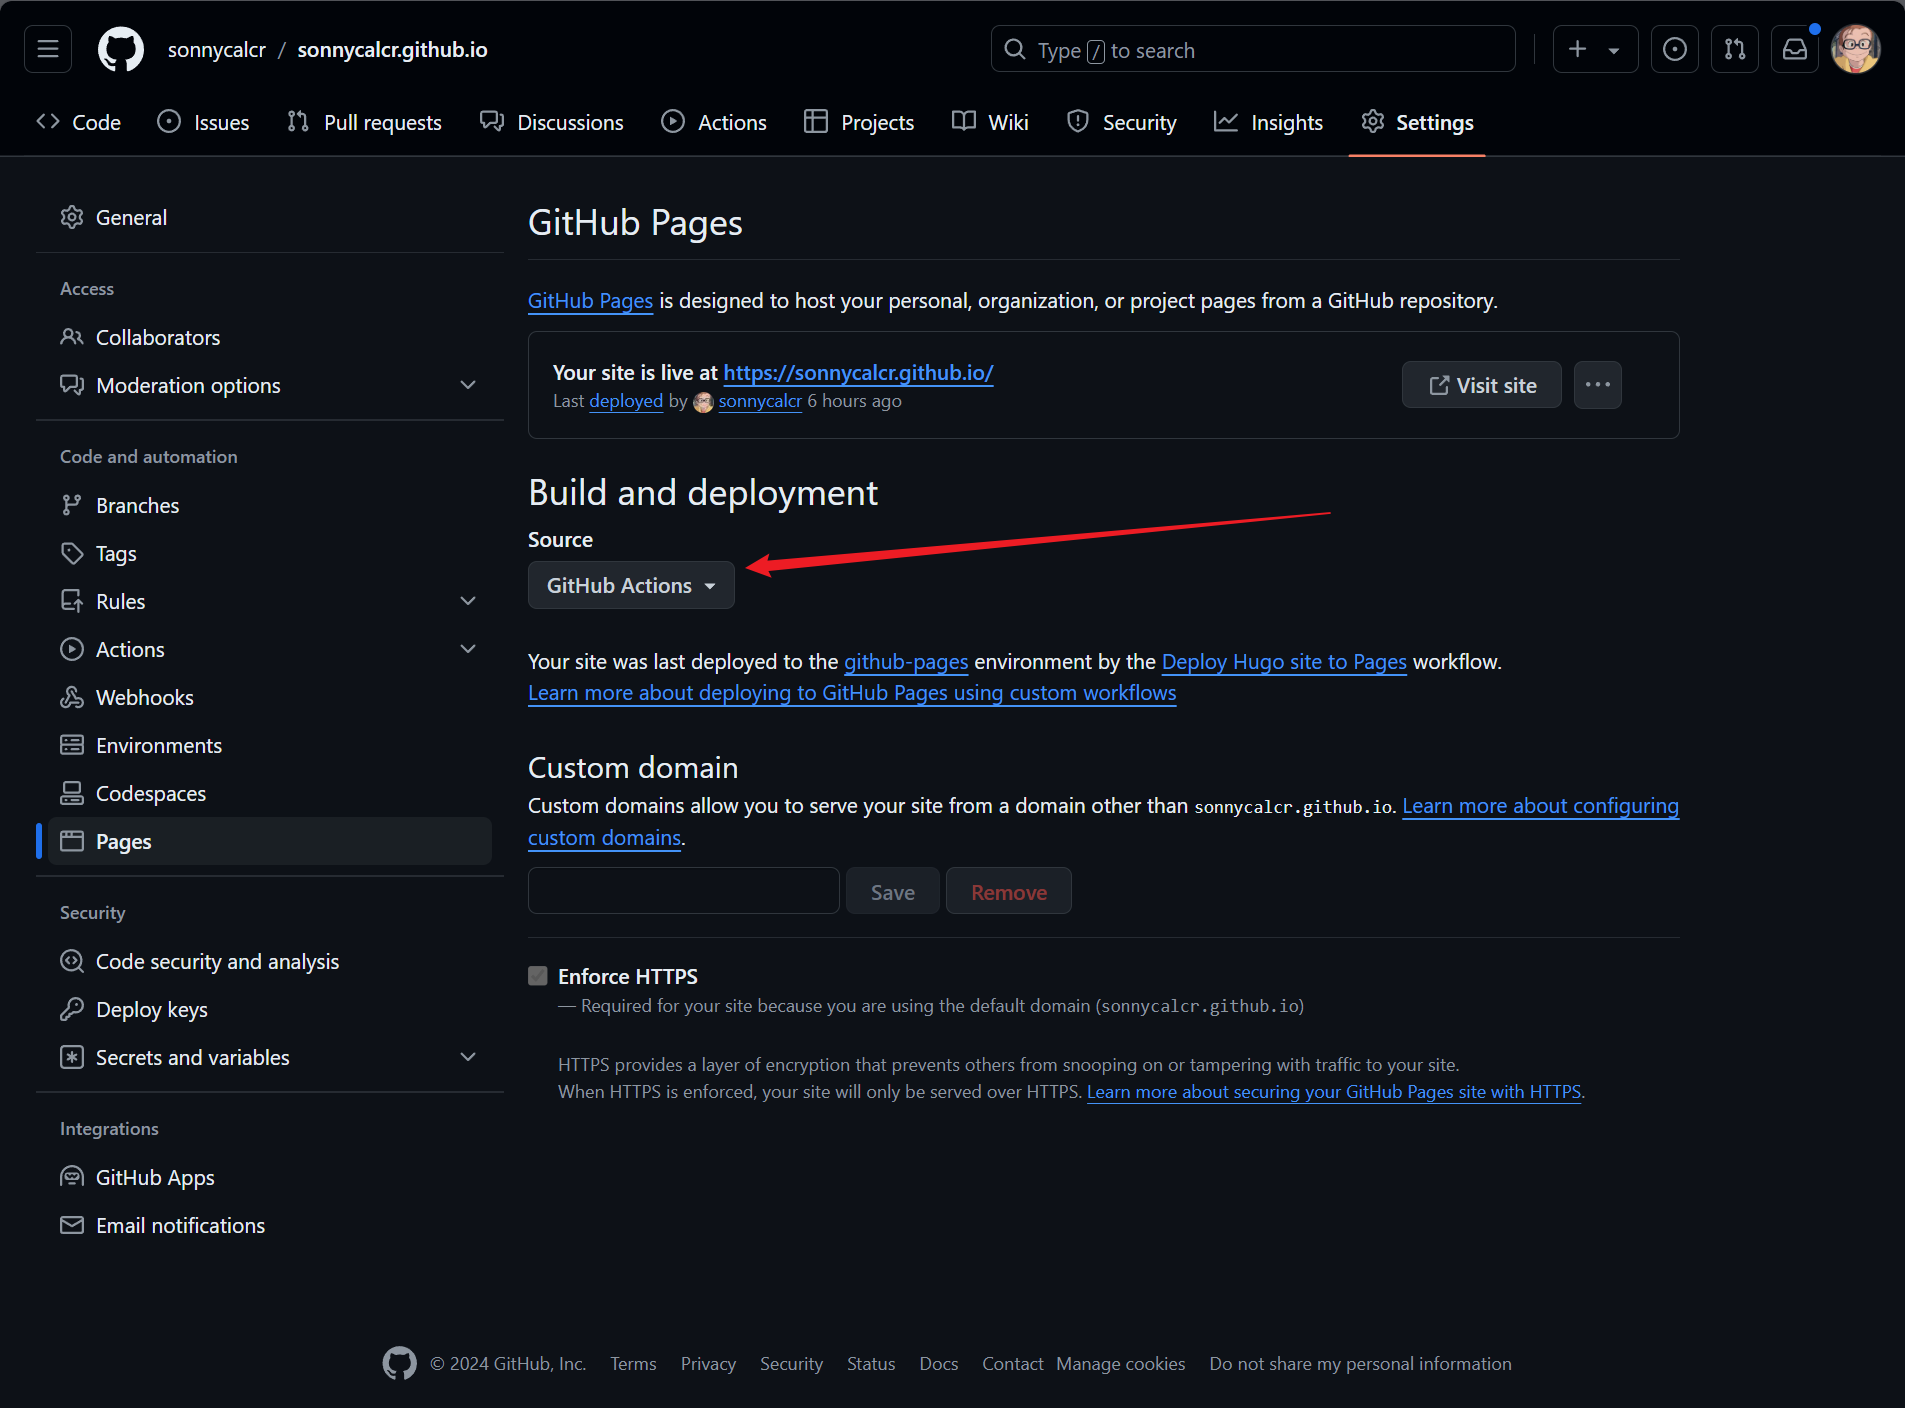
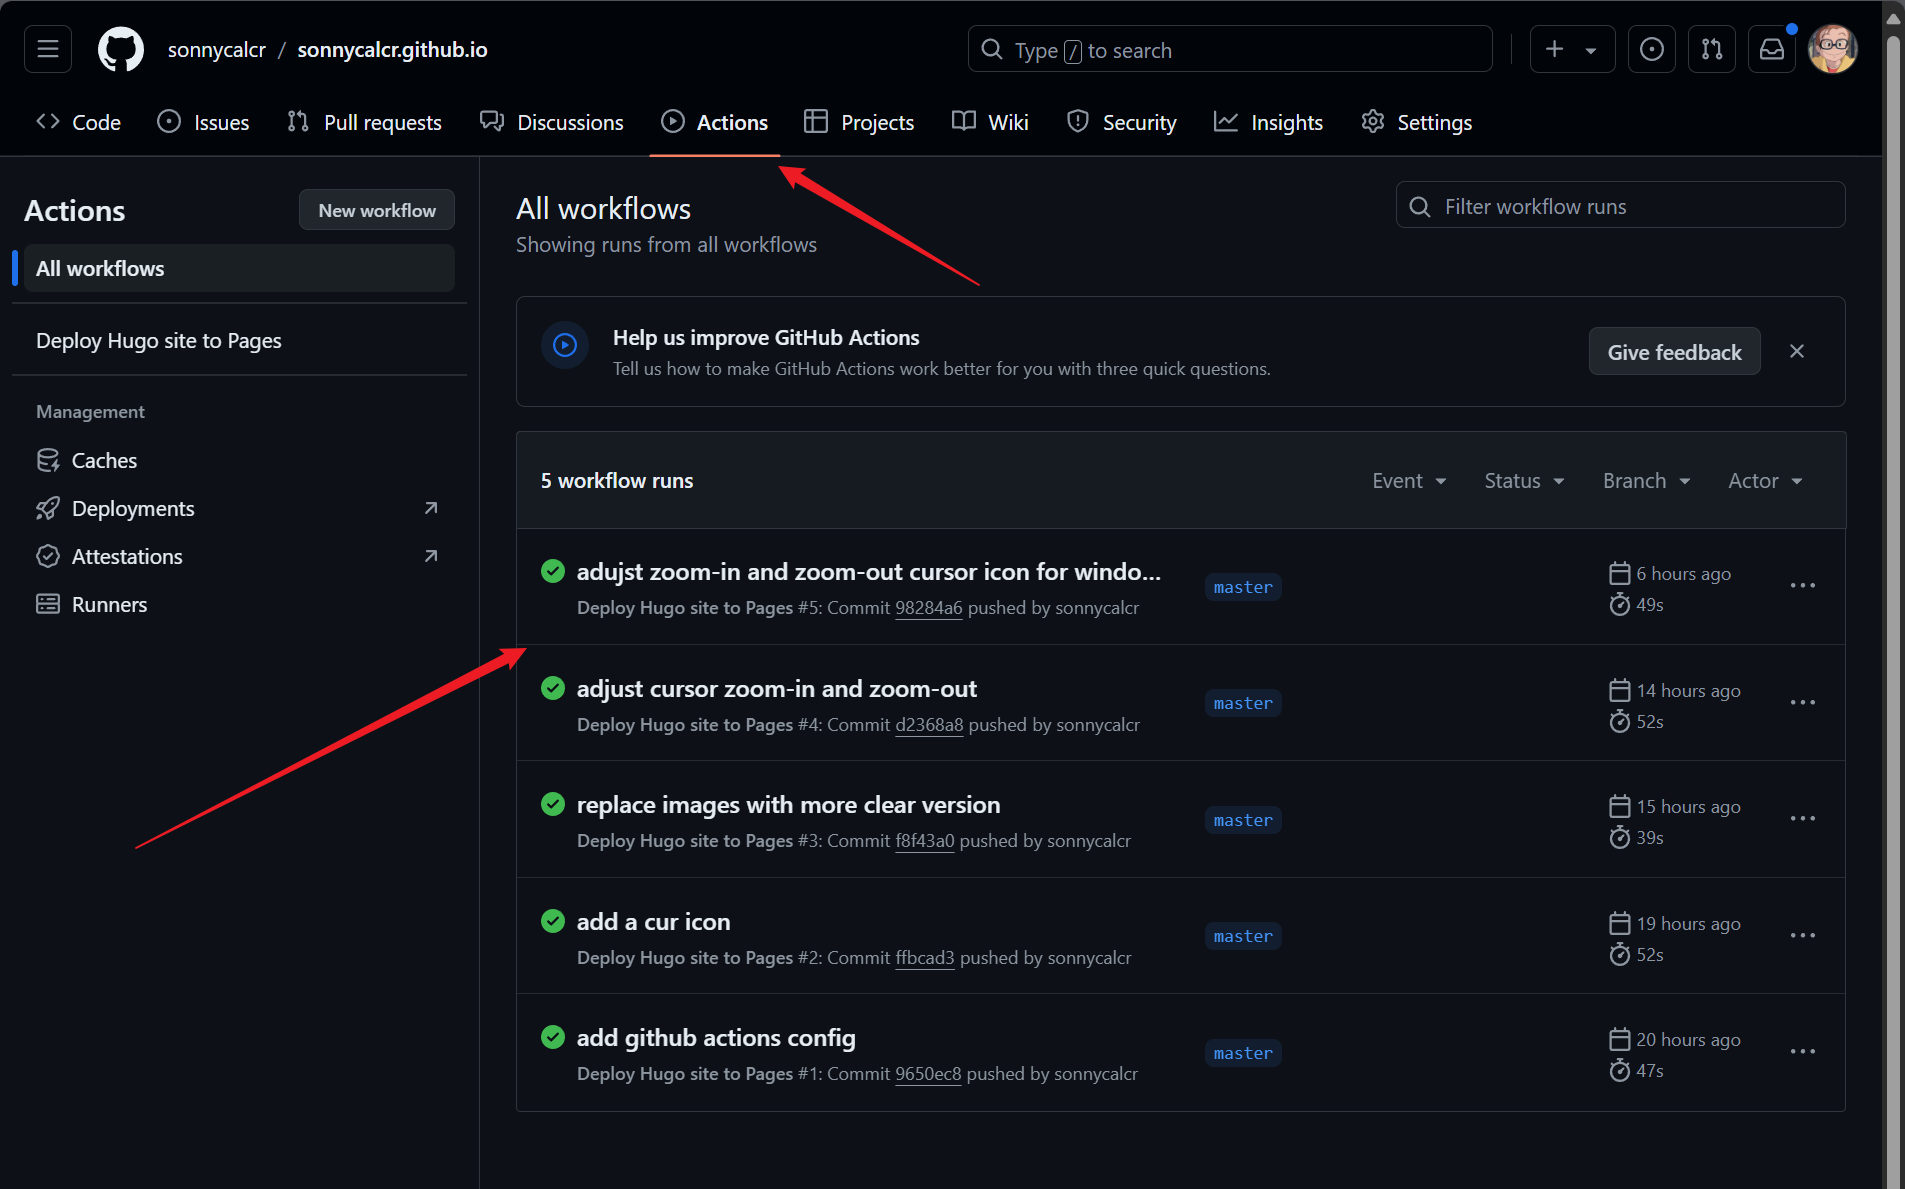
对于官方给出的 .github/workflows/hugo.yaml, 把其中的分支名改一下即可,或者同时把其中的 Hugo 的版本信息改成和本地的一致也可以。之后,每次推送就可以看到 Github 在部署了。
一些常用的 Hugo 命令
其实可能只有两个需要我们去记忆或者说熟悉,
hugo new content content/posts/xxxxx.mdhugo server
一些不足
PaperMod 的搜索十分简陋。但是,问题倒也不大。从好的方面来讲,该分享的内容是不影响分享的,而且,正式因为搜索不太好用,所以对个人的隐私可能反而会友好一点。
附录
参考: